
Settings, audit, terminal and WordPress
Settings
Section titled “Settings”Open Settings in the admin sidebar. The page has six tabs: General, Notifications, Sign-in policy, Your sign-in, API tokens and Developers.
Who can use it: server admins and super admins.
General
Section titled “General”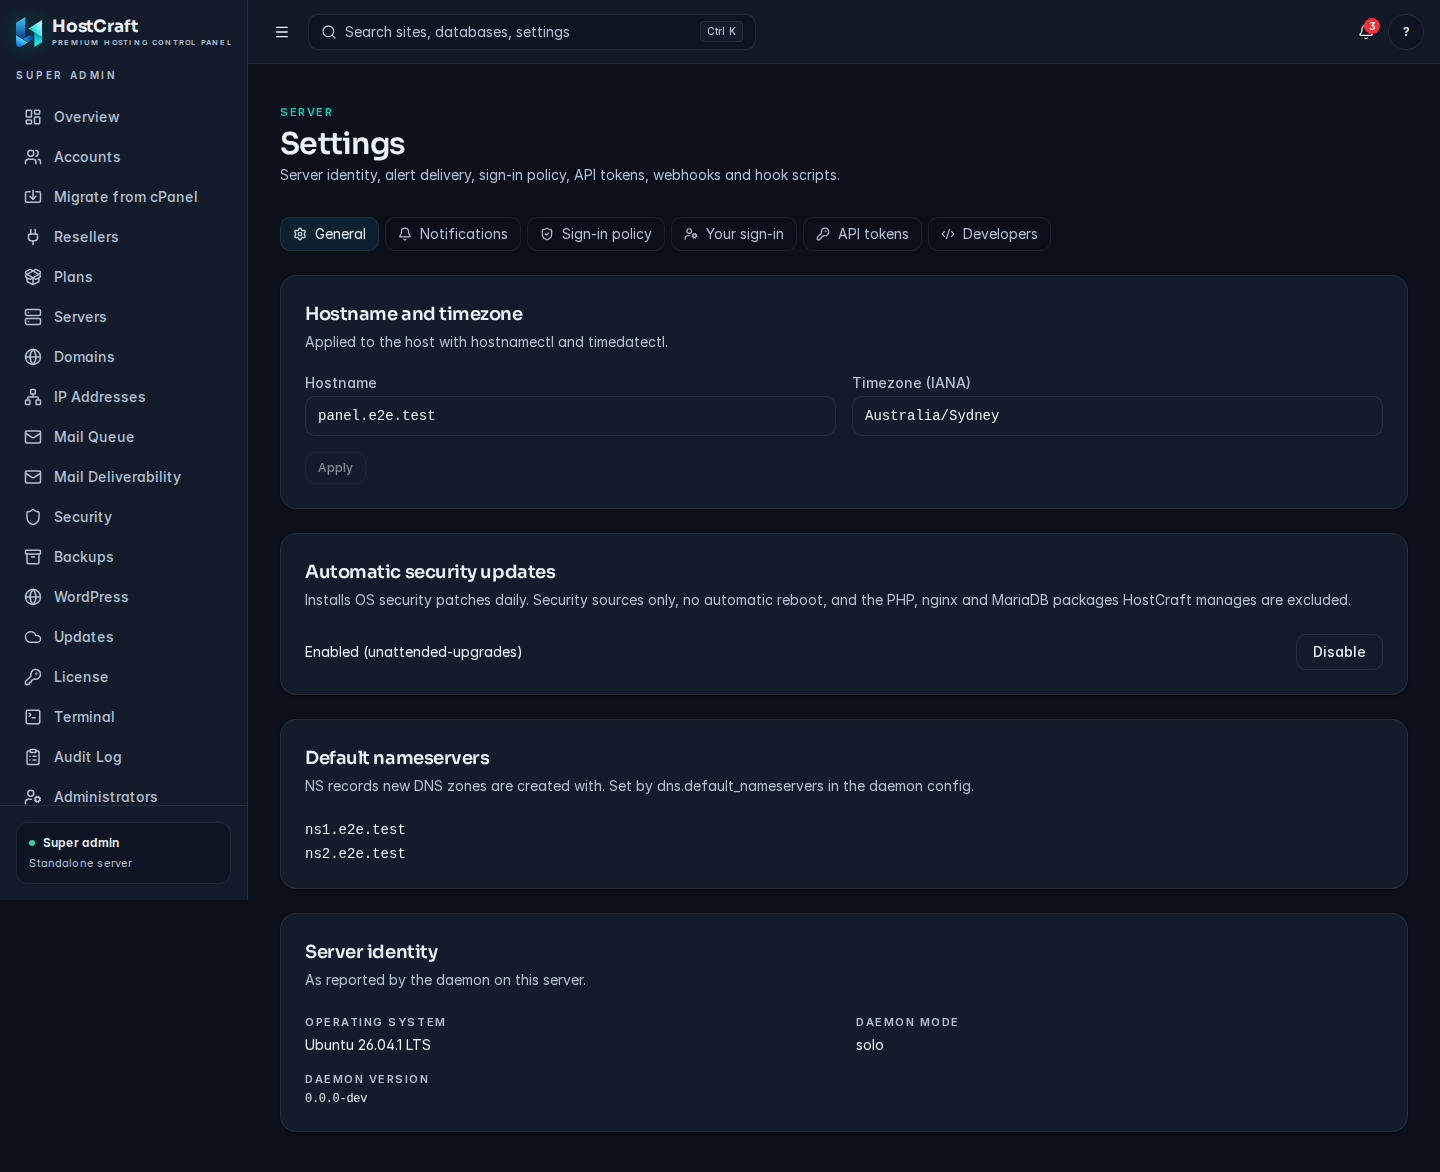
Hostname and timezone
- Change Hostname and/or Timezone (IANA), for example
Australia/Sydney. - Click Apply. Reset discards your edits.
The change is applied to the host with hostnamectl and timedatectl. Cron jobs and scheduled backups follow the server timezone.
Automatic security updates
Installs OS security patches daily. Only security sources are used, the server is never rebooted automatically, and the PHP, nginx and MariaDB packages HostCraft manages are excluded. The card shows whether it is Enabled or Disabled, the tool used (unattended-upgrades or dnf-automatic) and the last activity. Click Enable or Disable. If the tool is not installed, re-run the HostCraft installer to add it. On unsupported distributions the card says so.
Default nameservers
The NS records new DNS zones are created with. They are set by dns.default_nameservers in the daemon configuration and are read-only here.
Server identity
The operating system, daemon mode and daemon version.
Notifications
Section titled “Notifications”Outbound email is the relay HostCraft uses for password reset links, alerts and account notices. SMTP2GO on port 2525 is the default relay. The card shows where the current settings come from: SMTP relay (saved in the panel), the configuration file, Local postfix (mail leaves this server directly, and may land in spam without SPF, DKIM and reverse DNS for the panel hostname) or Not configured (password reset and alert email cannot be sent).
To set up a relay:
- Fill in SMTP host, Port, Username, Password (leave blank to keep a stored password) and From address (use an address on a domain your relay may send for).
- Leave Require STARTTLS ticked unless your relay does not support it.
- Under Send a test email, enter an address and click Send test email. Unsaved changes are tested as entered, so you can check credentials before saving.
- Click Save relay. Remove relay turns it off and falls back to the next source.
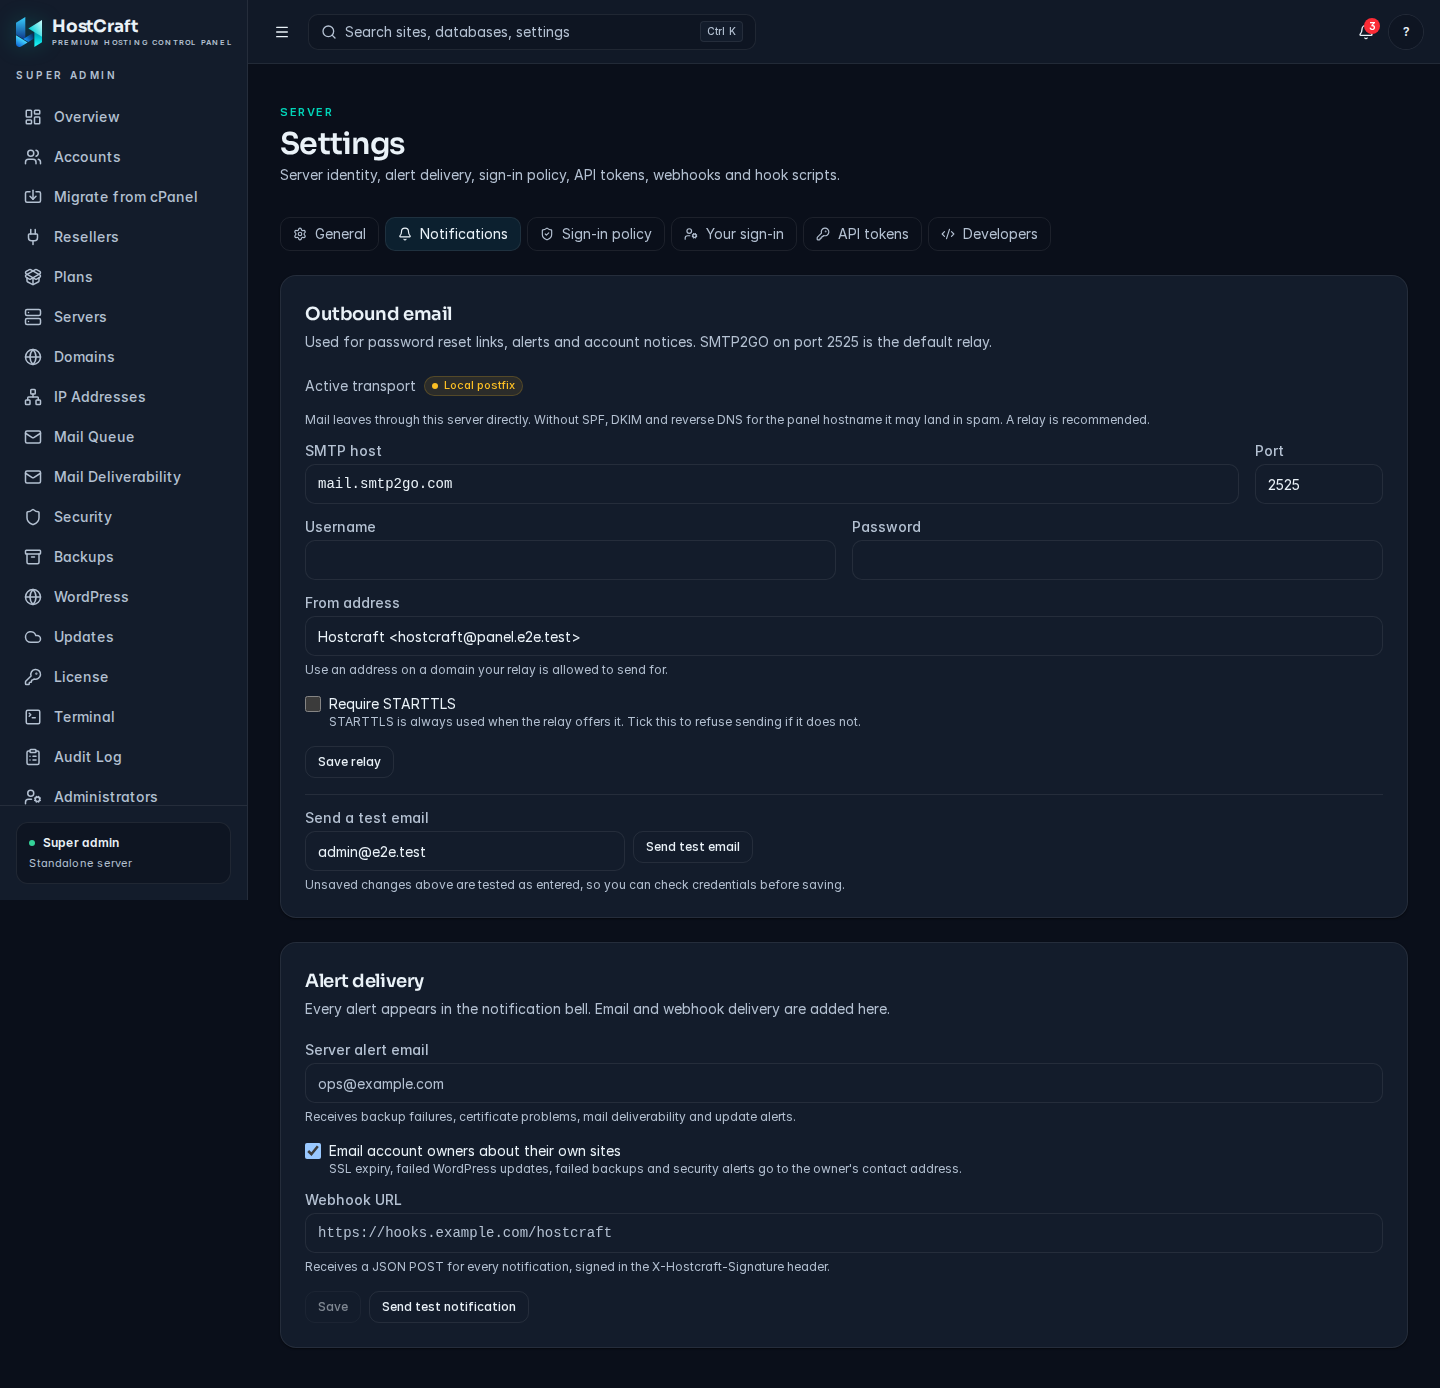
Alert delivery: every alert appears in the panel's notification bell. Add delivery here:
- Server alert email: receives backup failures, certificate problems, mail deliverability and update alerts.
- Email account owners about their own sites: SSL expiry, failed WordPress updates, failed backups and security alerts go to each owner's contact address.
- Webhook URL: receives a JSON POST for every notification, signed in the
X-Hostcraft-Signatureheader.
Click Save, then Send test notification to check delivery. When a webhook URL is set, the Webhook signing secret card shows the secret to verify deliveries with (HMAC SHA256 of the raw body). Click Rotate secret to replace it, then update the receiver.
Sign-in policy
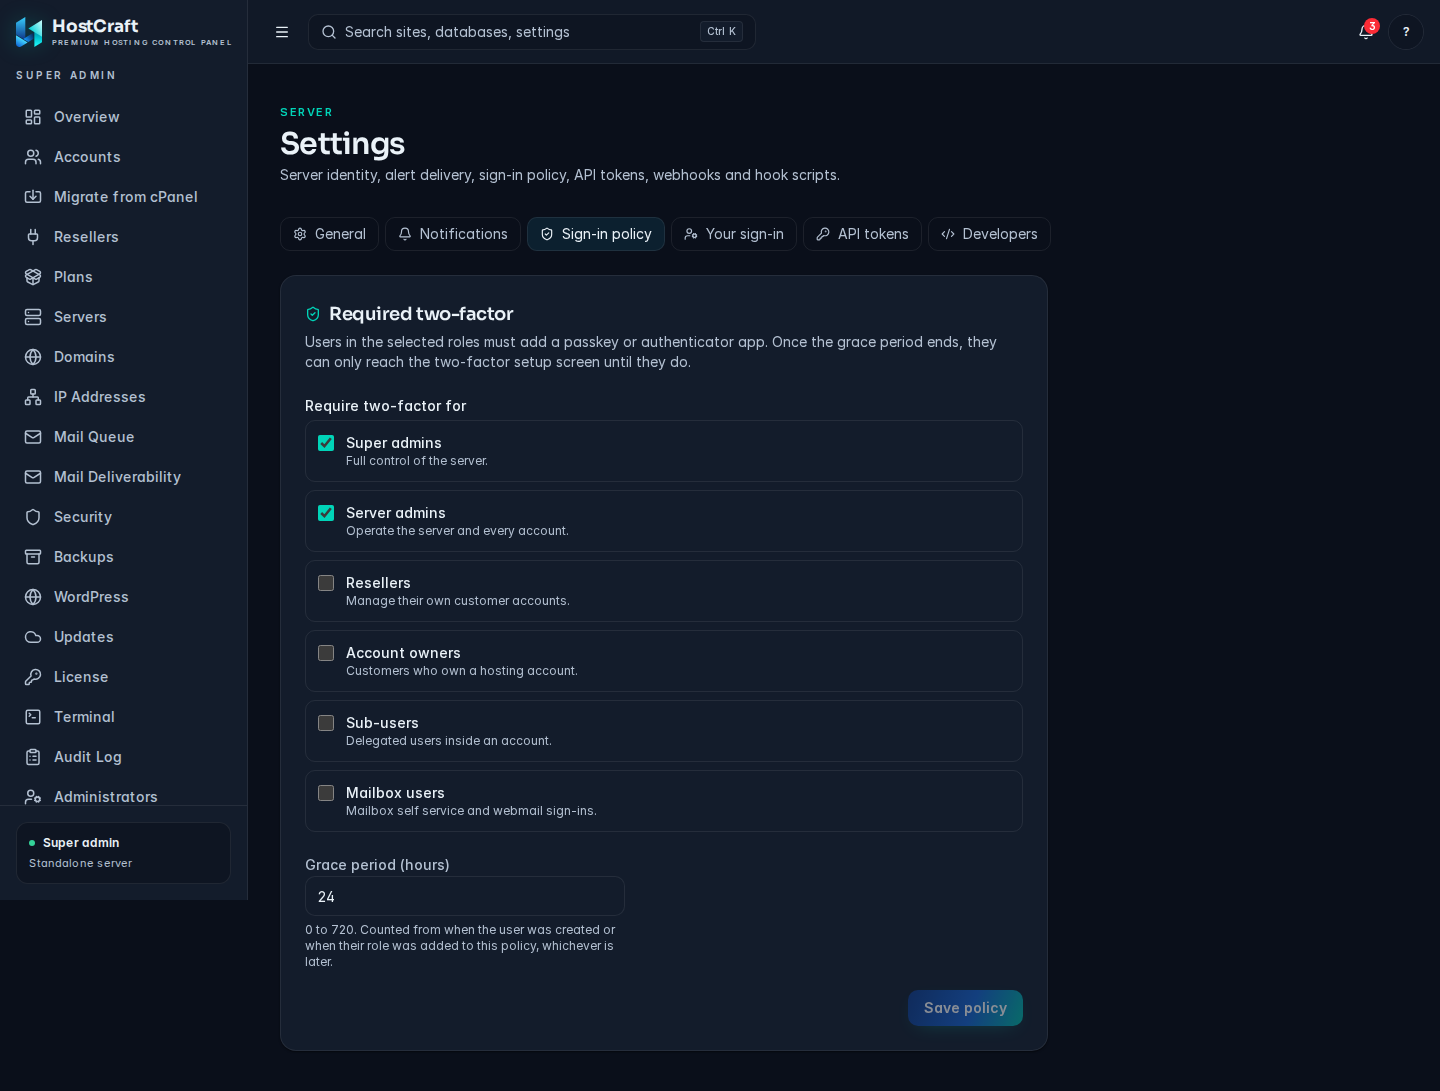
Section titled “Sign-in policy”Require two-factor sign-in by role.
- Under Require two-factor for, tick the roles: Super admins, Server admins, Resellers, Account owners, Sub-users and Mailbox users. Requiring it for both admin roles is strongly recommended; the card warns you when either is unticked.
- Grace period (hours): 0 to 720. Counted from when the user was created or when their role was added to the policy, whichever is later.
- Click Save policy.
Once the grace period ends, a user in a ticked role can only reach the two-factor setup screen until they add a passkey or authenticator app.
Your sign-in
Section titled “Your sign-in”Your own password, second factors and active sessions, the same as the customer settings page. See Settings.
API tokens
Section titled “API tokens”Scoped tokens for scripts and integrations, sent as Authorization: Bearer <token>. Tokens act as you.
- Enter a New token name, for example "Deploy CI".
- Expires: 30 days, 90 days, 1 year or No expiry.
- Under Scopes, tick only the permissions the integration needs. Use the filter box (for example
WebSiteorDNS). At least one scope is required. - Click Create token.
- Copy the token now. It is shown once.
The list shows each token's prefix, scopes, expiry and when it was last used. Click Revoke to stop a token working.
Developers
Section titled “Developers”Webhooks send signed POST requests (X-Hostcraft-Signature: t=<unix>,v1=<HMAC-SHA256>) when accounts, sites, certificates, mail, backups and migrations change. Failed deliveries are retried after 30 seconds, 1 minute, 5 minutes, 30 minutes, 2 hours and 12 hours. History is kept for 30 days.
To add an endpoint:
- Enter the Endpoint URL and an optional Description such as "Billing system".
- Under Events, leave All events ticked or pick specific events.
- Click Add webhook.
- Copy the signing secret shown. It is not shown again.
Each webhook row has Test (sends a ping), Pause / Resume, Edit events, Rotate secret and Delete. Click the URL to open Recent deliveries with each delivery's event, status, attempts, response and time; click Redeliver to send one again.
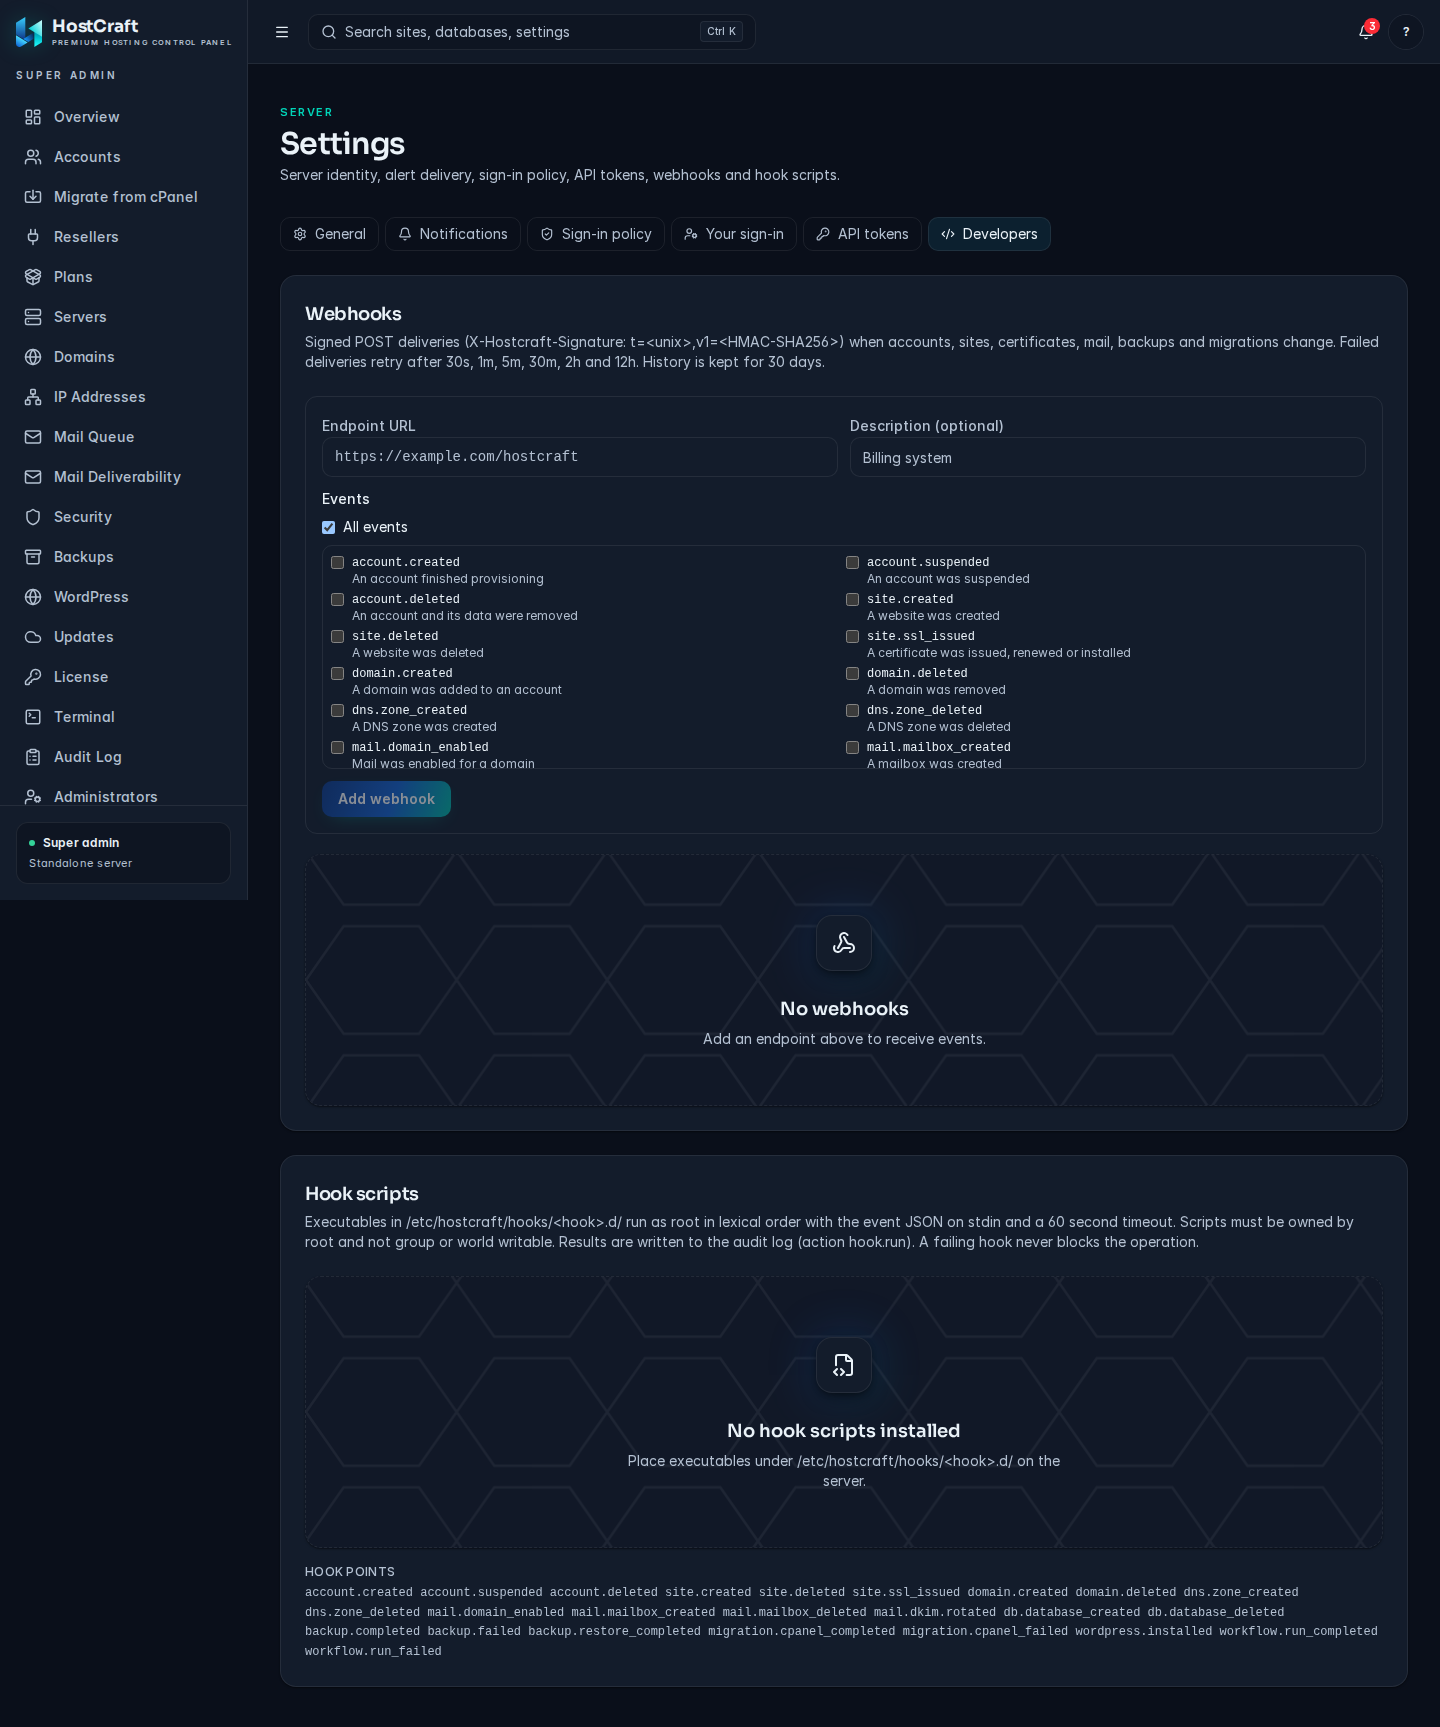
Hook scripts lists executables installed on the server under /etc/hostcraft/hooks/<hook>.d/. They run as root in name order with the event JSON on stdin and a 60 second timeout. Scripts must be owned by root and not writable by group or others; anything else is shown as skipped with the reason. Results are written to the audit log as hook.run. A failing hook never blocks the operation. Hook scripts are added on the server, not in the panel; the card lists the available hook points.
Audit log
Section titled “Audit log”Open Audit Log. It is an append-only record of every state change on the server.
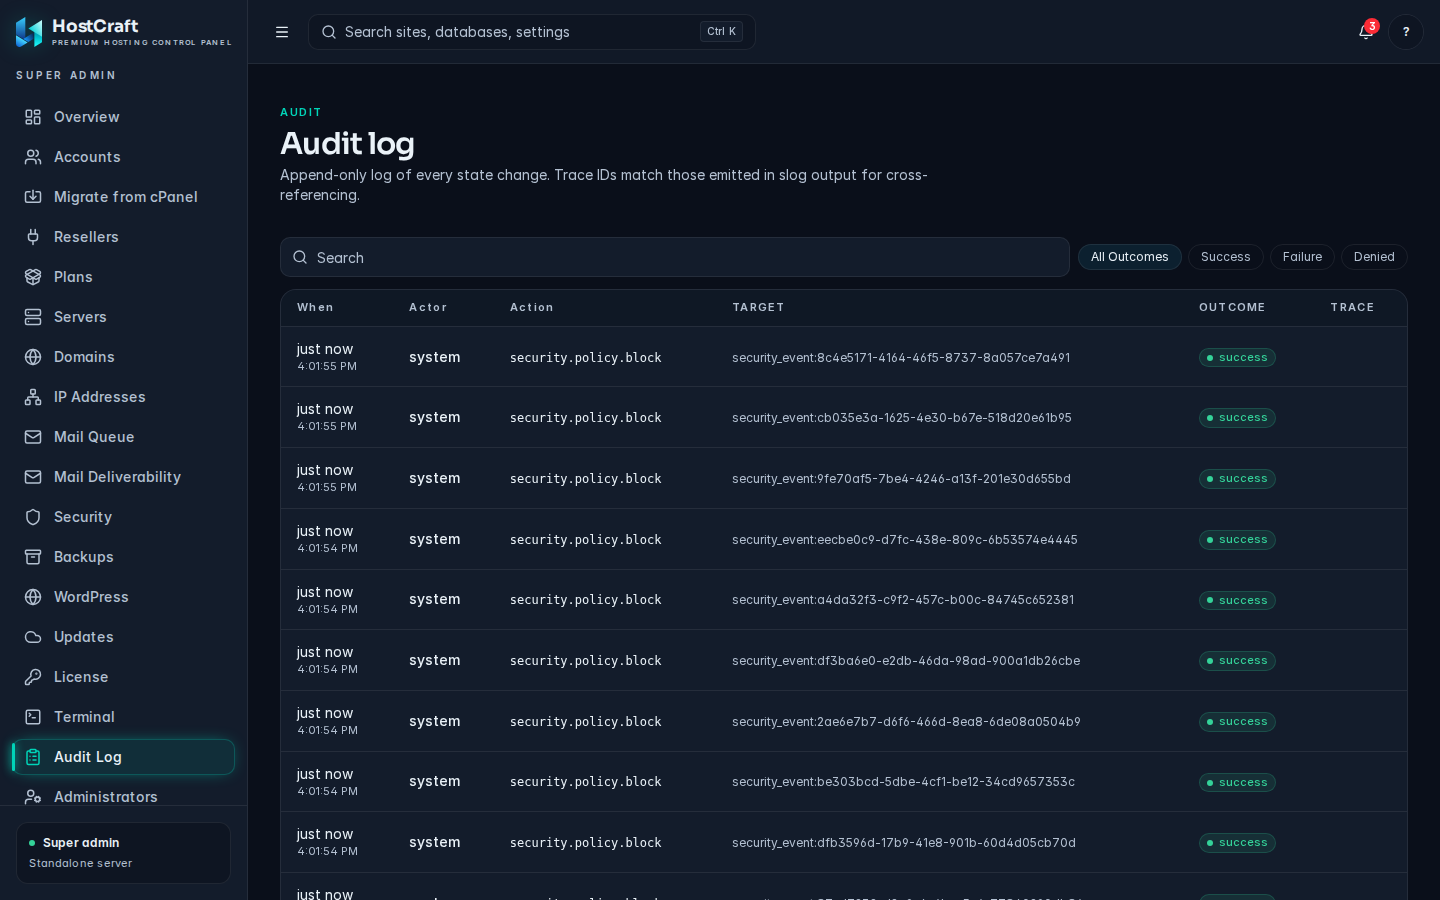
| Column | Meaning |
|---|---|
| When | Relative and exact time. |
| Actor | The user ID that made the change, and their IP. |
| Action | For example account.create or hook.run. |
| Target | The type and ID of what changed. |
| Outcome | success, failure or denied. |
| Trace | The trace ID. The same ID appears in the daemon's logs, so support can follow one request end to end. |
Filter with All outcomes, success, failure and denied, and search by actor, action, target or trace ID. Click a row to open the Audit entry drawer, which adds the session, any error text and the Before and After values of the change.
Tip: when a customer reports a problem, ask for the time and search for their account ID. When a workflow fails, search for the trace ID shown in the dialog.
Account terminal
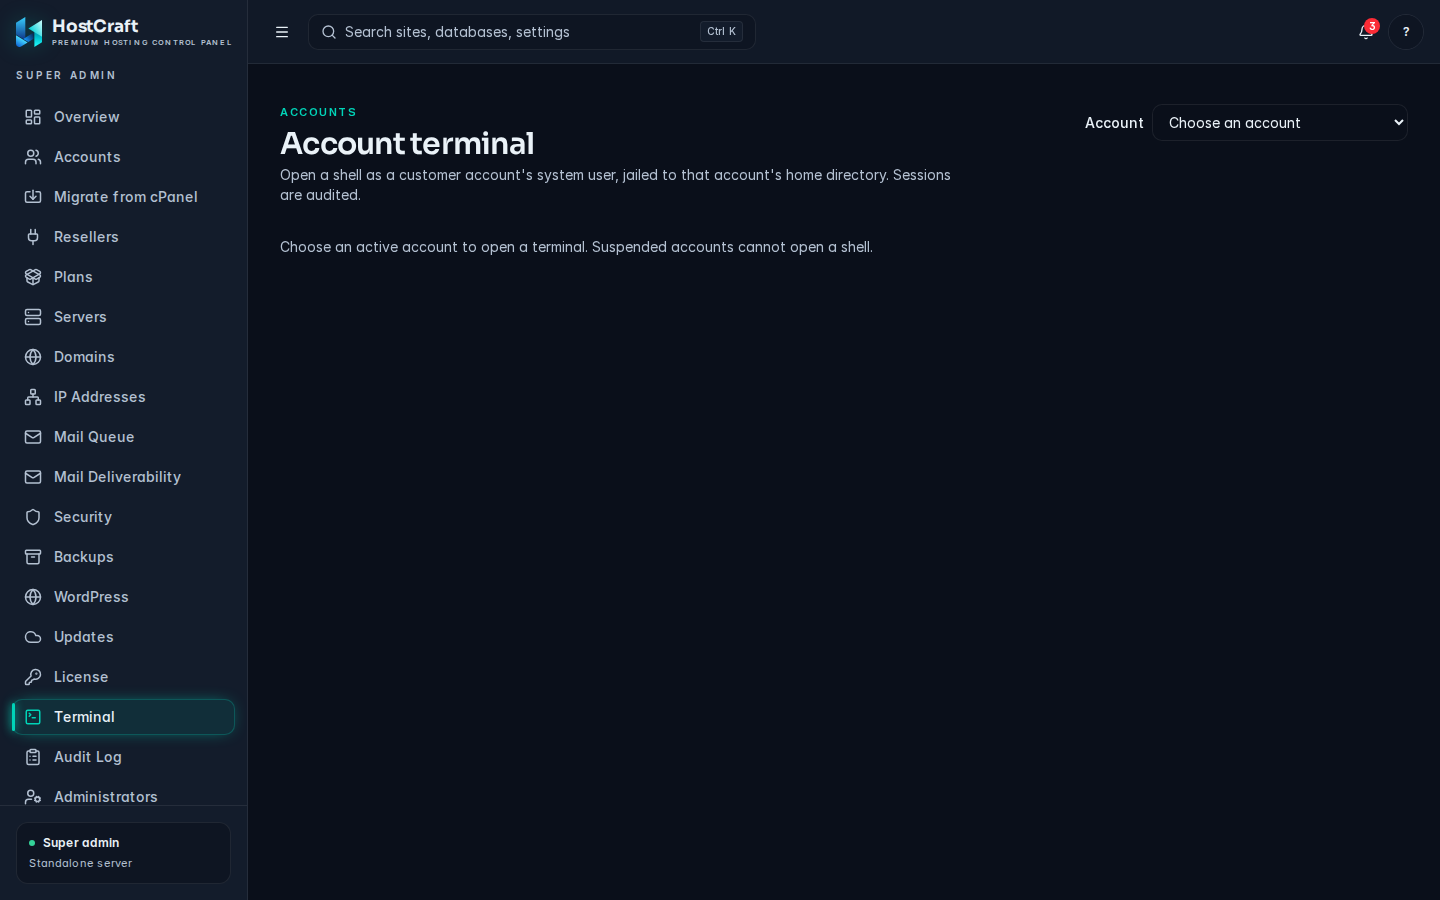
Section titled “Account terminal”Open Terminal. The page is titled Account terminal. It opens a shell as a customer account's system user, jailed to that account's home directory. Sessions are audited.
- Choose the Account. Only active accounts are listed; suspended accounts cannot open a shell.
- The terminal connects in the page. Work as you would over SSH as that user.
If you see "The web terminal is not available on this server.", the terminal service is not enabled.
WordPress fleet
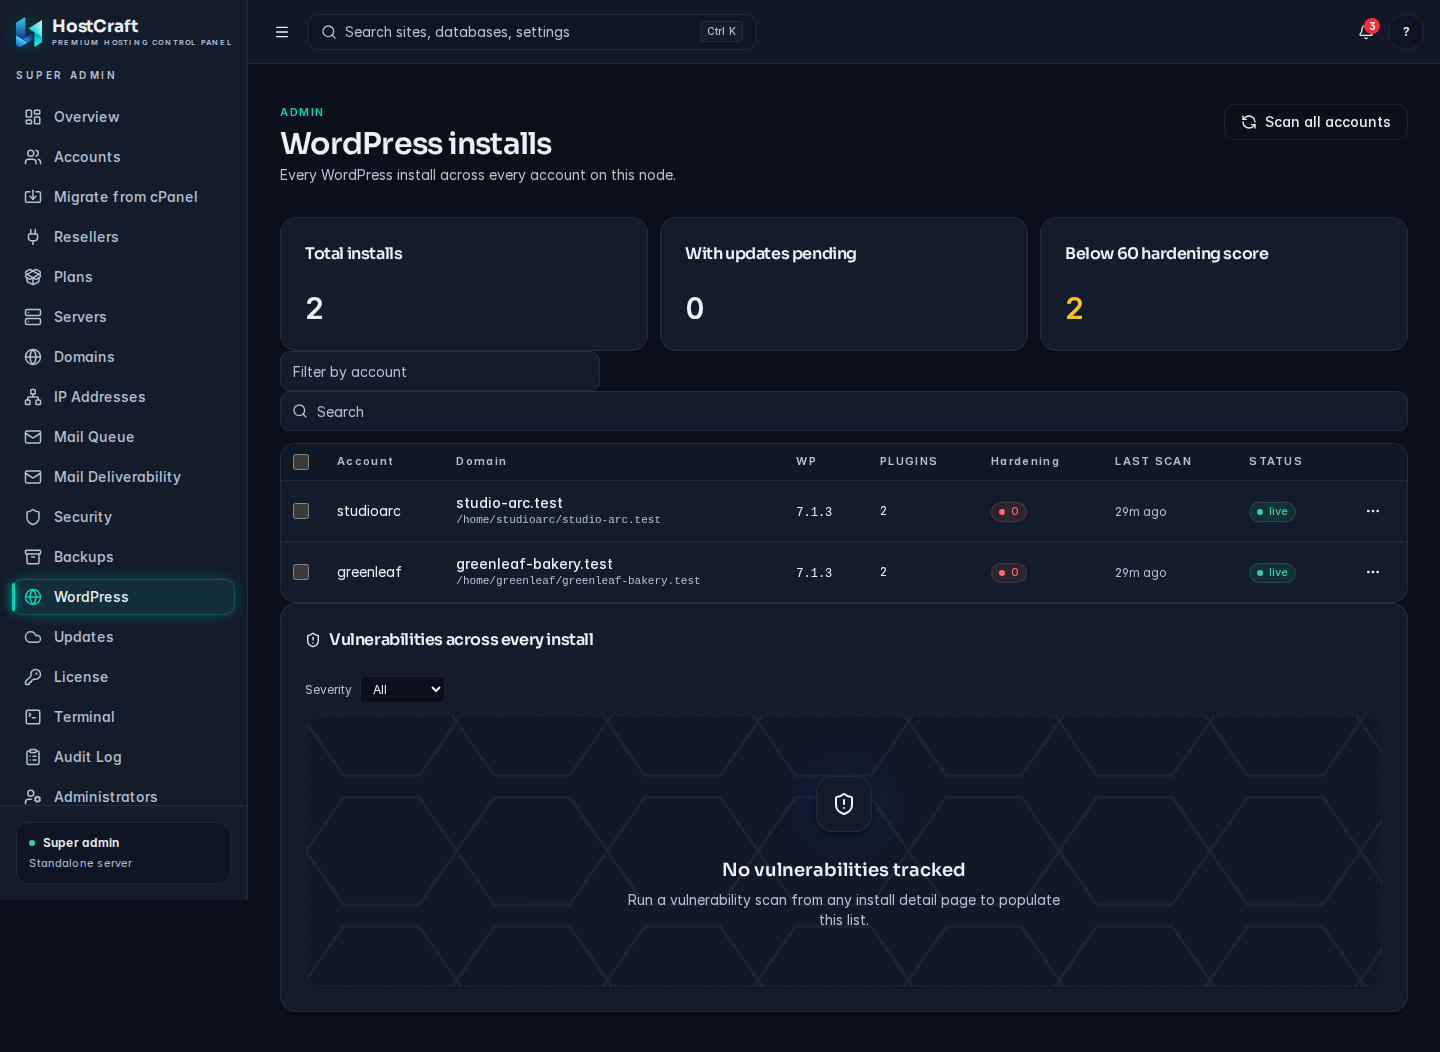
Section titled “WordPress fleet”Open WordPress. The page is titled WordPress installs and lists every WordPress install across every account. WordPress Toolkit installs need a license that includes them.
Find installs
Section titled “Find installs”If nothing is listed yet, click Scan all accounts to discover existing WordPress sites. Run the scan again after migrating accounts.
Summary cards show Total installs, With updates pending and Below 60 hardening score. The table lists Account, Domain (and document root), WP version, Plugins (with the number that have updates), Hardening score, Last scan and Status (live or staging). Narrow it with Filter by account id or the search box.
Act on one install
Section titled “Act on one install”Open the install's row menu. These are the same tools account owners have (see WordPress):
- Updates: Update core, plugins and themes opens a dialog where you update WordPress core (optionally to a Target version), each plugin and theme, or Update everything. Updates run in place, so back up first. Smart update (staging test first) tests updates on a staging copy and reverts automatically if they fail.
- Tools: Enable debug mode / Disable debug mode (WP_DEBUG), Search and replace across the database (use Preview for a dry run before Replace), and Reset admin password (enter the Username, click Generate, and copy the new password; it is shown once).
- Backups: Back up now saves files and database; Restore from backup lists backups and restores the one you choose.
- Staging: Clone to staging copies the site to a subdomain (enter the Subdomain label, choose Copy media uploads, click Clone). On a staging copy, Promote staging to live snapshots the live site and replaces it, and Discard staging removes the copy.
- Security: Hardening check lists each check with pass, warn or fail, with Apply fix and Revert. Vulnerability scan checks plugins, themes and core against vulnerability feeds; Vulnerabilities shows the findings.
- Delete install: drops the site's database and files after you confirm.
Bulk updates
Section titled “Bulk updates”Tick several installs and choose Smart update selected. Each one is tested on staging first and reverted if it fails.
Vulnerabilities across every install
Section titled “Vulnerabilities across every install”The Vulnerabilities across every install panel lists findings from every install, most severe first, with Severity, CVE (title, fixed-in version and source), Install, Affected installs, First seen and Status. Filter with Severity.
- Update to fixed version updates that plugin or theme.
- Acknowledge asks for a reason, writes it to the audit log and marks the finding dismissed.
- Tick findings and choose Schedule update for all affected installs to run a smart update on each affected install.
If the panel says No vulnerabilities tracked, run a vulnerability scan on an install first.