
DNS
HostCraft runs PowerDNS as the authoritative nameserver for your domains. A zone is created automatically when you add a domain, and changes go live as soon as you save them.
Who can use this page
Section titled “Who can use this page”| Role | What they can do |
|---|---|
| Account owner | Create and delete zones, add and change records, DNSSEC, import and export, for the account's domains. |
| Sub-user | Only what the account owner granted. Without DNS permission the DNS item does not appear in the sidebar. A read-only support login can view records, check and export a zone, but all change buttons are hidden. |
| Mailbox user | No access. |
| Admin and reseller | The DNS page is part of the customer panel. The admin panel lists domains across accounts under Domains. |
The DNS page
Section titled “The DNS page”Open DNS in the sidebar. If the account has more than one zone, pick it from the Zone list. A link from elsewhere in the panel can open a specific zone directly.
The top of the page shows four tiles:
- Zones: how many zones the account has.
- Records: how many records are in the selected zone.
- Type: the zone type (native or master) and its SOA serial, which goes up each time the zone changes.
- DNSSEC: On or Off.
Below the tiles:
- Nameservers: the NS records in the zone. Set these at your domain registrar so the internet uses HostCraft for your domain.
- DS records: shown only when DNSSEC is on. Publish these at your registrar.
- Records: the record table, with Name, Type, Value and TTL. MX records show their priority before the value. Disabled records are shown struck through. Search by name or value; 15 records per page.
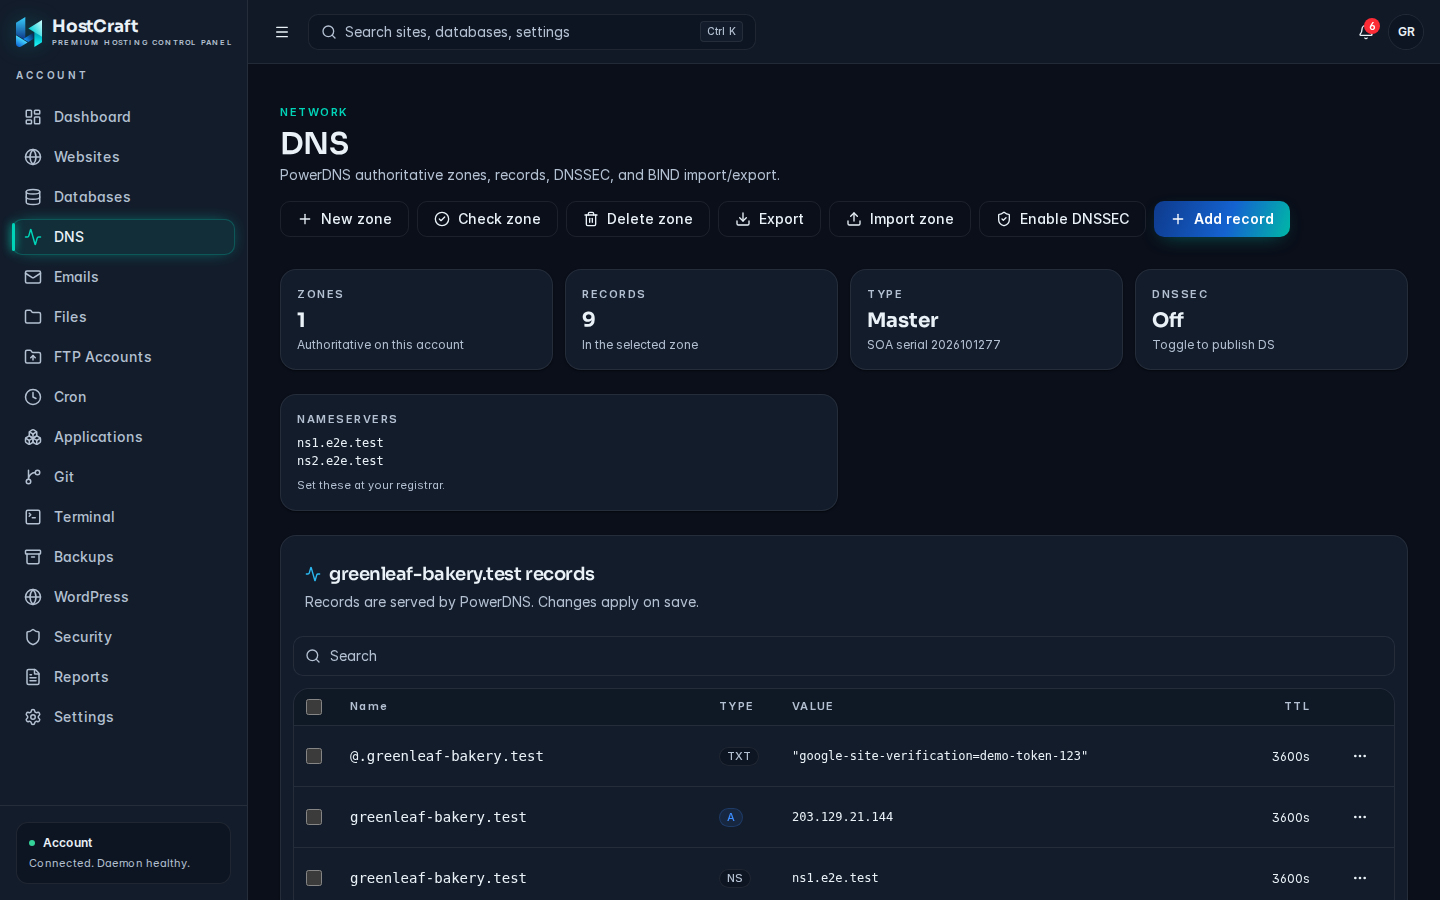
The buttons at the top right are New zone, Check zone, Delete zone, Export, Import zone, Enable DNSSEC (or Disable DNSSEC) and Add record.
Default records
Section titled “Default records”A new zone always gets SOA and NS records. Zones created when you add a domain also get the records the domain needs, typically an A record pointing at your server. When you enable mail for a domain, its MX record is managed for you (see Outbound relay and MX). Check the record table for what your zone actually contains.
Add a record
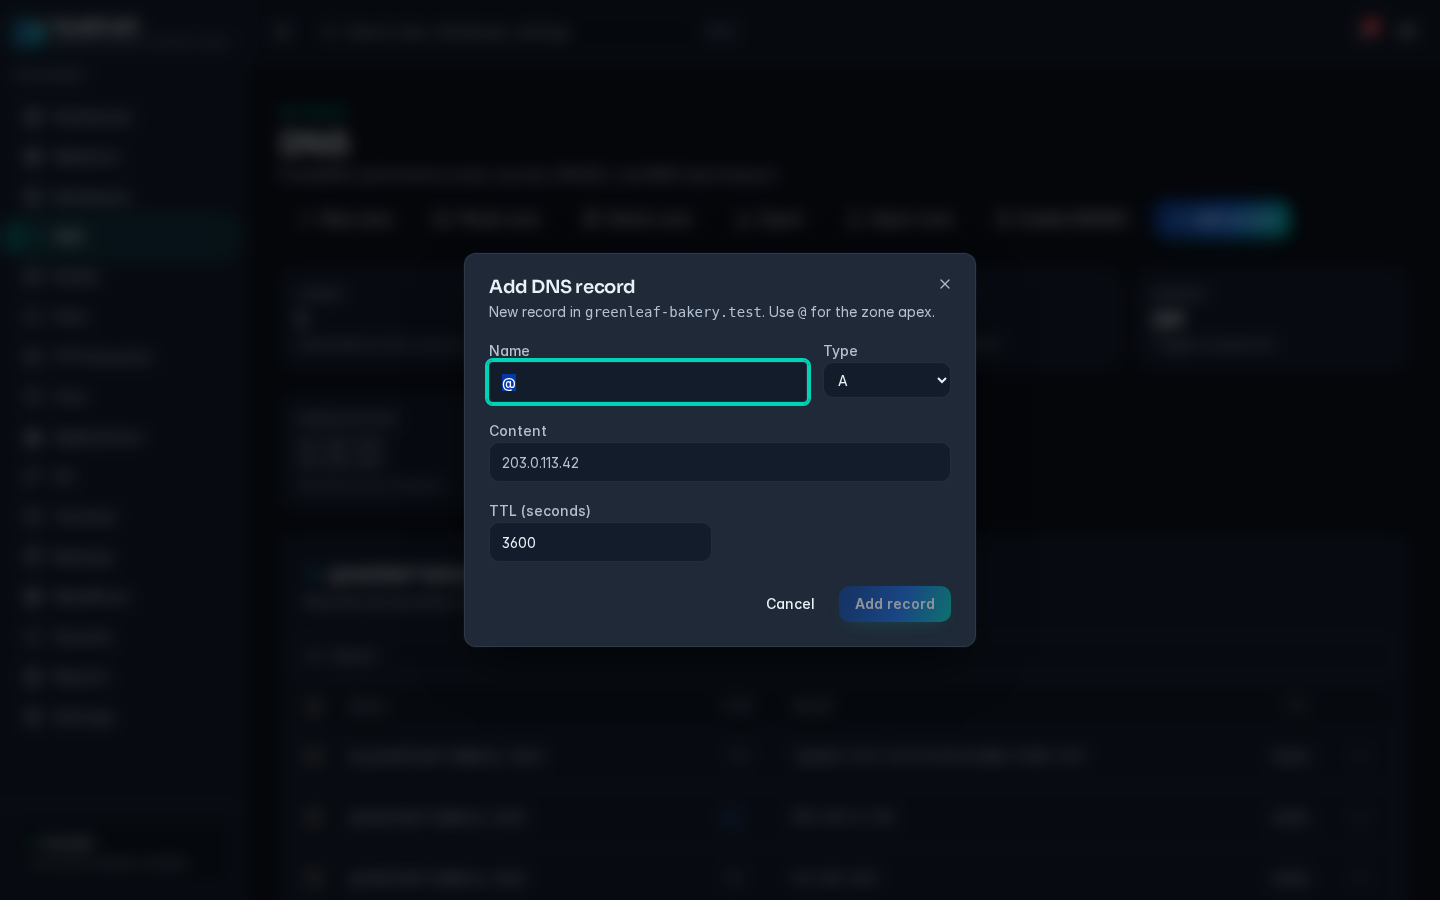
Section titled “Add a record”- Click Add record.
- Name: the host name inside the zone. Use
@for the domain itself, or a label such aswww. - Type: A, AAAA, CNAME, MX, TXT, NS, SRV, CAA or PTR.
- Content: the value, for example
203.0.113.42for an A record ortarget.example.com.for a CNAME. - TTL (seconds): how long resolvers may cache the record. Default 3600, minimum 60.
- Priority: shown only for MX and SRV. Lower numbers are tried first. Default 10.
- Click Add record.
The record is served immediately. If the server rejects a value, the reason appears in red in the dialog.
Record types
Section titled “Record types”| Type | Use |
|---|---|
| A | Points a name at an IPv4 address. |
| AAAA | Points a name at an IPv6 address. |
| CNAME | Makes a name an alias of another name. |
| MX | Says which server receives mail for the domain. |
| TXT | Free text. Used for SPF, DKIM, DMARC and verification tokens. |
| NS | Delegates a name to nameservers. |
| SRV | Locates a service, used by some VoIP, chat and Microsoft services. |
| CAA | Limits which certificate authorities may issue SSL certificates. |
| PTR | Reverse lookup. Only useful in reverse zones. |
Examples
Section titled “Examples”; www as an alias of the domainwww 3600 CNAME example.com.
; IPv6 address for the domain@ 3600 AAAA 2001:db8::1
; Google site verification@ 3600 TXT "google-site-verification=abc123"
; Only Let's Encrypt may issue certificates@ 3600 CAA 0 issue "letsencrypt.org"
; Microsoft 365 autodiscoverautodiscover 3600 CNAME autodiscover.outlook.com.Disable, enable or delete records
Section titled “Disable, enable or delete records”Open the ... menu on a record row:
- Disable record: stops serving the record without deleting it. Enable record brings it back.
- Delete record: removes it after a confirmation.
To change several records at once, tick them in the table and use the bulk actions Enable, Disable or Delete. A line confirms the result, for example "Bulk change applied: 0 created, 3 updated, 0 deleted."
To change a record's value, add the corrected record and delete the old one.
Check a zone
Section titled “Check a zone”Click Check zone to validate the selected zone. The result shows "Zone check: valid" or "Zone check: problems found", with errors in red and warnings below. Fix errors before you point your registrar at HostCraft.
Create a zone
Section titled “Create a zone”Zones are normally created for you when a domain is added. To create one by hand:
- Click New zone.
- Domain: the zone name, for example
example.com. - Type: Native (the default, right for almost everyone) or Master.
- Default A record (optional): an IPv4 address for the domain itself.
- Click Create zone.
The zone is created with SOA and NS records and selected in the page.
Delete a zone
Section titled “Delete a zone”Click Delete zone and confirm. The zone and all of its records are deleted. The domain stops resolving if its registrar still points at HostCraft.
DNSSEC
Section titled “DNSSEC”DNSSEC signs your records so resolvers can detect forged answers.
Enable DNSSEC
Section titled “Enable DNSSEC”- Click Enable DNSSEC.
- The DNSSEC tile turns On and a DS records card appears.
- Copy each DS record and add it at your domain registrar, in its DNSSEC section. If the card says "No DS records reported yet.", wait a moment and reload.
The registrar may ask for the parts separately: key tag, algorithm, digest type and digest, in that order in the DS record.
Disable DNSSEC
Section titled “Disable DNSSEC”Remove the DS records at your registrar first and wait for the change to propagate (allow a day or two). Then click Disable DNSSEC. Disabling while the registrar still publishes DS records makes the domain fail to resolve for validating resolvers.
Import a BIND zone
Section titled “Import a BIND zone”Use this to bring records over from another DNS host.
- Select the target zone and click Import zone.
- Paste the zone file into Zone file, or click Upload file to load it from disk. It can include
$ORIGINand standard records. - Leave Replace existing records (otherwise merge) unticked to add the imported records to what is there. Tick it to replace the zone's records with the file.
- Click Import.
The dialog reports "Imported N records." Parse problems appear in red.
Export a zone
Section titled “Export a zone”Click Export. Your browser downloads example.com.zone, a standard BIND zone file. Use it as a backup or to move to another provider.
Lower the TTL before a move
Section titled “Lower the TTL before a move”A day before you change where a domain points, lower the TTL of the affected records to 300. After the change, caches refresh within five minutes. Raise the TTL again afterwards.
MX priority
Section titled “MX priority”Lower numbers win. With priorities 10 and 20, mail goes to the 10 server and uses the 20 server only if the first is unreachable.
No CNAME at the apex
Section titled “No CNAME at the apex”A CNAME cannot be used on @, because the apex must also hold SOA and NS records. Use an A or AAAA record with the service's IP address instead.
Long TXT records
Section titled “Long TXT records”A single TXT string is limited to 255 characters. Long values such as DKIM keys must be split into several quoted strings in the same record: "v=DKIM1; k=rsa; " "p=MIIBIjAN...".
Common problems
Section titled “Common problems”| Problem | Cause and fix |
|---|---|
| Changes do not show up | Resolvers cache records for the TTL. Wait, or test against the HostCraft nameserver directly with dig @ns1.example.net example.com. |
| Domain does not resolve at all | The registrar does not list the nameservers from the Nameservers card. Update them at the registrar. |
| Domain broke after enabling DNSSEC | The DS record at the registrar does not match. Copy it again from DS records. |
| "No DNS zones yet" | The account has no domains. Add a domain, or create a zone with New zone. |
| Change buttons are missing | Your login is read-only or lacks DNS permissions. Ask the account owner. |
| Mail stopped after editing MX | If mail is handled by HostCraft, keep Manage MX records automatically on in the Emails Domains tab instead of editing MX by hand. |