
Websites
The Websites page is where you create and run every website on your hosting account. It replaces the cPanel screens for Domains, Redirects, MultiPHP Manager, MultiPHP INI Editor, Directory Privacy, Error Pages, Hotlink Protection, IP Blocker, Raw Access, Errors and SSL/TLS.
Open it from the sidebar: Websites.
Who can use this page
Section titled “Who can use this page”| Role | Access |
|---|---|
| Account owner | Full access to every website on their own account. |
| Sub-user | Sees the page only when the account owner granted website access. A sub-user with the read-only support preset can open every dialog but cannot save, create, disable or remove anything. |
| Server administrator | Uses the admin area. The Websites page belongs to the account panel; a few site options (marked below) can only be changed by a server administrator. |
| Reseller | Manages accounts and domains from the reseller area, not this page. |
| Mailbox user | No access. Mailbox users only see their own mailbox and webmail. |
How the page is laid out
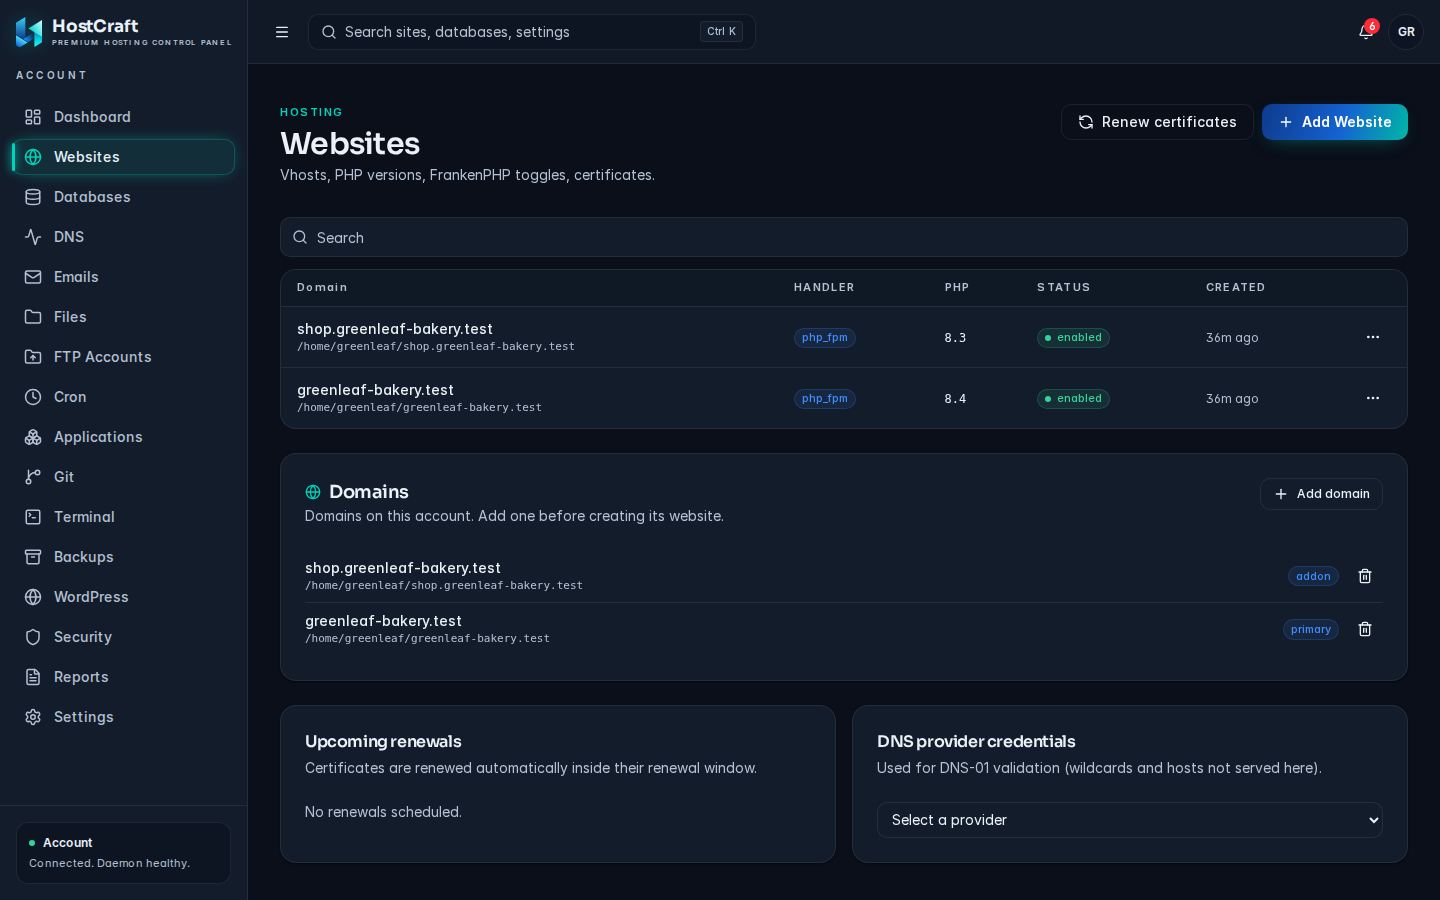
Section titled “How the page is laid out”- The websites table lists each site with its domain name and document root, the Handler (how requests are served), the PHP version, the Status (enabled or disabled) and when it was created. A PHP version shown in amber means the site runs in legacy mode (PHP 5.6 to 7.3). Use the search box to filter by domain. Each row has an actions menu (the three dots on the right).
- Domains lists every domain on the account, with its type (primary, addon or parked). You add a domain here before you can create its website.
- Upcoming renewals and DNS provider credentials cover SSL certificates for the whole account.
When the account has no websites yet, the page shows a short introduction and an Add Website button instead of the table.
Add a domain
Section titled “Add a domain”A website is always attached to a domain on your account, so add the domain first.
- In the Domains panel, click Add domain.
- Fill in the dialog:
- Domain name: for example
example.com. Leave outwwwandhttps://. - Type: Primary, Addon or Parked. A parked domain shows the same content as another domain; choose that domain under Parks onto.
- Document root (optional): the folder the website is served from. Leave it blank to use the account's default web root.
- Domain name: for example
- Save the dialog.
Adding a domain also creates its DNS zone when DNS for the domain is managed on this server. See DNS.
To remove a domain, click the bin icon next to it and confirm. The domain's website and DNS zone are removed too. Files on disk are kept.
Add a website
Section titled “Add a website”- Click Add Website at the top of the page.
- Fill in the Add a website dialog:
- Domain: pick one of your domains. If the list is empty the dialog says "No domains on this account. Add one first."
- Handler: how the site is served. See Handlers below.
- PHP version: shown for PHP-FPM. The list contains only the versions installed on this server, newest first. Versions 5.6 to 7.3 are marked (legacy mode).
- Upstream: shown for Reverse proxy. The address of your own application, for example
http://127.0.0.1:3000. - Document root (optional): a custom folder for this site. Leave blank to use the domain's document root.
- Click Create website.
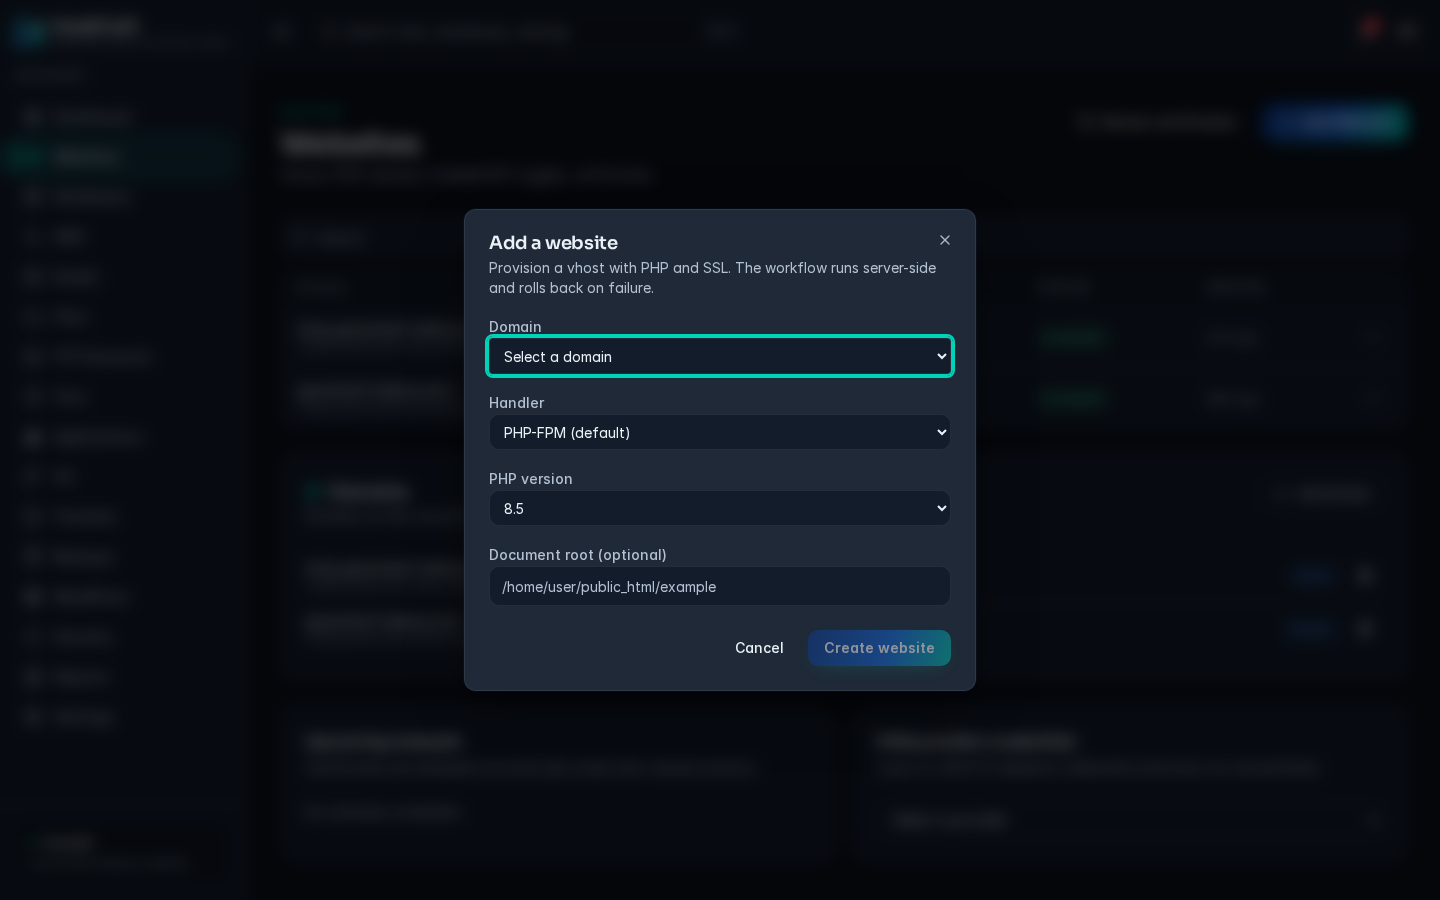
The dialog shows live progress while the server sets the site up. The work runs as one workflow: if any step fails, everything it did is rolled back, so you never end up with a half-built site. The dialog closes by itself when the site is ready.
Handlers
Section titled “Handlers”| Handler | What it does | Use it for |
|---|---|---|
| PHP-FPM (default) | nginx passes PHP requests to a PHP-FPM pool running as your account user. You pick the PHP version. | WordPress, Laravel, Joomla and almost every PHP site. Choose this when in doubt. |
| FrankenPHP | Runs PHP inside FrankenPHP, one process per account, as your account user. The PHP version is the one bundled with FrankenPHP on this server, shown in the dialog. | Modern PHP applications that benefit from FrankenPHP. Test your site first: not every application is happy with it. |
| Static (no PHP) | Serves files directly. PHP is never run. | Plain HTML, CSS and JavaScript sites and static site generator output. |
| Reverse proxy | Forwards every request to the Upstream address you enter. | An application you run yourself on a private port. For Node.js and Python, the Applications page sets this up for you. |
FrankenPHP shows (not installed) and cannot be picked when the server administrator has not installed it.
The upstream for a reverse proxy must be an http:// or https:// URL with a host. Link-local addresses and the HostCraft panel itself are refused.
Change the handler or PHP version
Section titled “Change the handler or PHP version”- Open the row's actions menu and choose Change runtime (PHP-FPM, FrankenPHP).
- The dialog shows what the site uses now. Choose the new Handler and, for PHP-FPM, the new PHP version (or the new Upstream for a reverse proxy).
- Click Switch runtime.
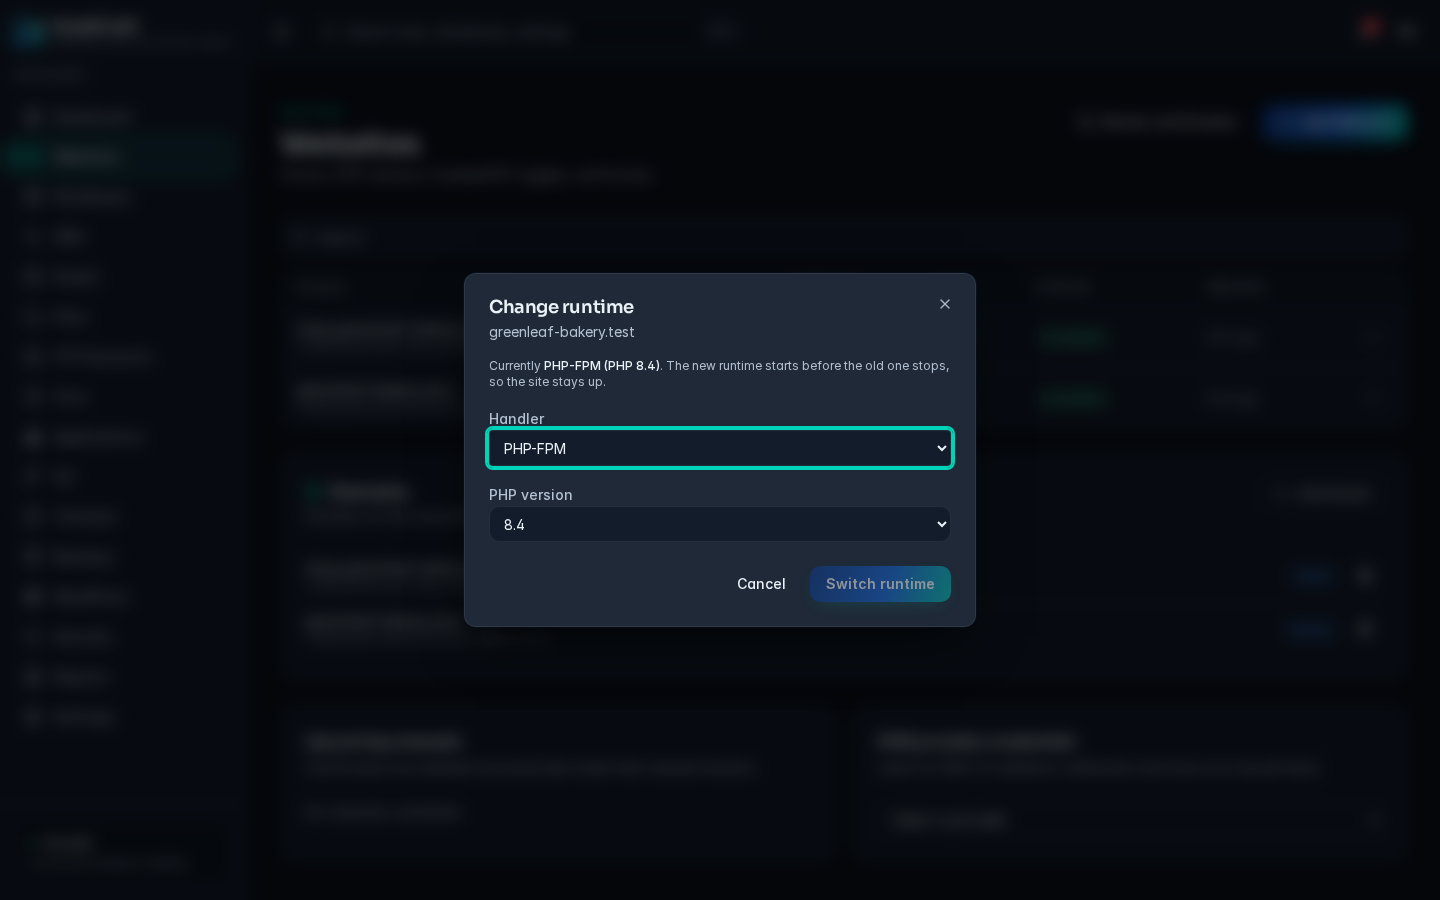
The new runtime is started before the old one is stopped, so the site stays online. If the switch fails, the site keeps serving exactly as before. Switch runtime stays greyed out until you actually change something.
PHP INI overrides (see below) apply only to PHP-FPM sites. When you switch a site to FrankenPHP the dialog reminds you of this.
Legacy PHP versions
Section titled “Legacy PHP versions”PHP 5.6, 7.0, 7.1, 7.2 and 7.3 run in legacy mode. They no longer get security fixes from the PHP project, so use them only to keep an old site running while you upgrade it. Whether legacy versions are available depends on your hosting plan and on the server's licence. If you need one and it is not in the list, ask your hosting provider.
Site settings: redirects, PHP and access
Section titled “Site settings: redirects, PHP and access”Open the row's actions menu and choose Redirects, PHP and access. The Site settings dialog has seven tabs. Change as many tabs as you like, then click Save once. The server checks the whole configuration, applies it and rolls back automatically if the web server rejects it. When it is done you see "Saved and applied."
Redirects
Section titled “Redirects”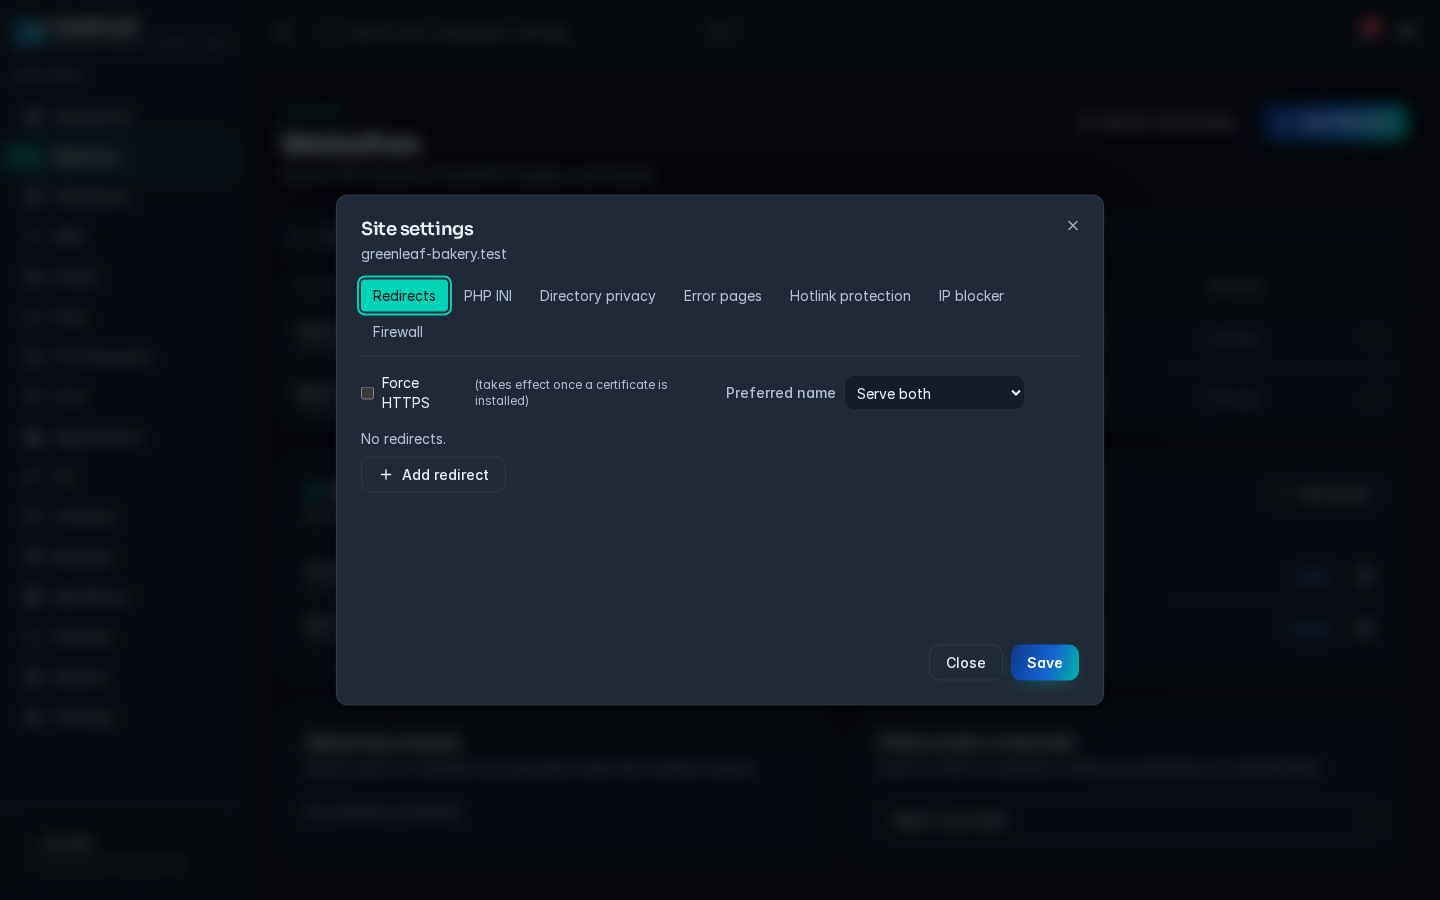
- Force HTTPS: sends every
http://visitor tohttps://. If the site has no certificate yet, it takes effect once one is installed. - Preferred name: Serve both, Redirect to www or Redirect to non-www.
- Add redirect adds a row with:
- Source path, for example
/old-page. - Target, a path or a full URL such as
https://example.com/new. - Status code: 301 permanent, 302 temporary, 307 temporary or 308 permanent.
- Host: Any name, or only the bare or
wwwname of the site. - Wildcard: keeps the rest of the path, so
/old/agoes totarget/a.
- Source path, for example
- The bin icon removes a redirect.
A site can have up to 500 redirects.
PHP INI
Section titled “PHP INI”Per site PHP settings, the same as cPanel's MultiPHP INI Editor. Leave a field blank to use the server default. This tab only works for PHP-FPM sites; for other handlers it explains that it does not apply.
| Setting | Meaning | Allowed values |
|---|---|---|
date.timezone |
Default timezone | A timezone name, for example Australia/Sydney |
display_errors |
Show errors in page output | Default, On, Off |
error_reporting |
Which errors are reported | For example E_ALL & ~E_NOTICE |
max_execution_time |
Script time limit in seconds (0 means no limit) | 0 to 3600 |
max_file_uploads |
Files per upload request | 1 to 1000 |
max_input_time |
Seconds allowed to parse input | -1 to 3600 |
max_input_vars |
Input variables per request | 100 to 100000 |
memory_limit |
Memory per script | 16M to 4G |
output_buffering |
Output buffer size in bytes (0 disables) | 0 to 1048576 |
post_max_size |
Maximum POST body size | 1M to 4G |
session.gc_maxlifetime |
Session lifetime in seconds | 60 to 31536000 |
short_open_tag |
Allow <? short tags |
Default, On, Off |
upload_max_filesize |
Maximum size of one uploaded file | 1M to 4G |
zlib.output_compression |
Compress page output | Default, On, Off |
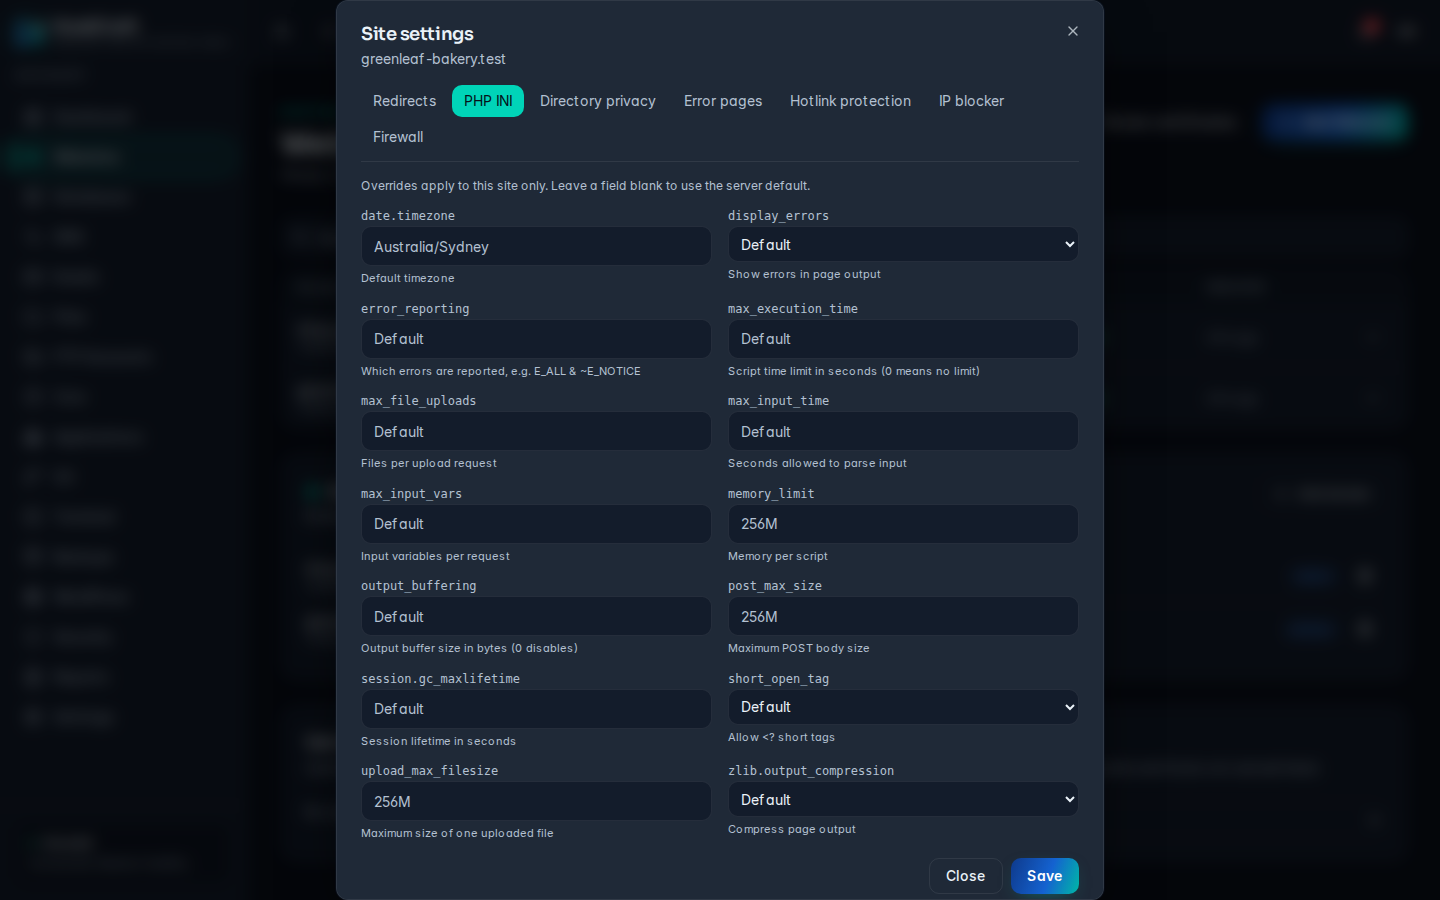
Sizes are written as a number with an optional K, M or G, for example 256M. A value outside the allowed range is refused with a message that names the range.
Directory privacy
Section titled “Directory privacy”Makes visitors sign in with a username and password before they can open a path.
- Click Protect a path.
- Enter the Protected path (for example
/members) and the Prompt name the browser shows (for exampleRestricted Area). - Enter a username and password. Click Add user for more people.
- Click Save.
When you edit an existing user, the password field says unchanged. Leave it blank to keep the current password. Usernames may use letters, digits and . _ @ - (up to 64 characters). A site can have up to 50 protected paths with up to 200 users each.
Error pages
Section titled “Error pages”Set a custom page for status codes 400, 401, 403, 404, 405, 410, 429, 500, 502, 503 and 504. Enter either a path in the document root (for example /404.html) or a full https:// URL. Leave a code blank for the default page.
Hotlink protection
Section titled “Hotlink protection”Stops other websites from embedding your images and files.
- Block other sites from embedding these files turns protection on.
- Allow direct requests (no referer) lets people open a file directly or from bookmarks.
- Protected extensions: a comma separated list, for example
jpg, jpeg, gif, png, bmp, webp. - Other allowed sites: one per line. Use
*.example.comto allow every subdomain. The site's own names are always allowed. Up to 100 entries.
IP blocker
Section titled “IP blocker”- Blocked addresses: one IPv4 or IPv6 address or CIDR range per line, for example
203.0.113.7or198.51.100.0/24. - Allow only these addresses (optional): when you fill this in, every other address is refused. This includes the checks Let's Encrypt makes to renew your certificate, so HTTP certificate renewal stops working while an allow list is set.
Each list holds up to 2000 entries.
Firewall
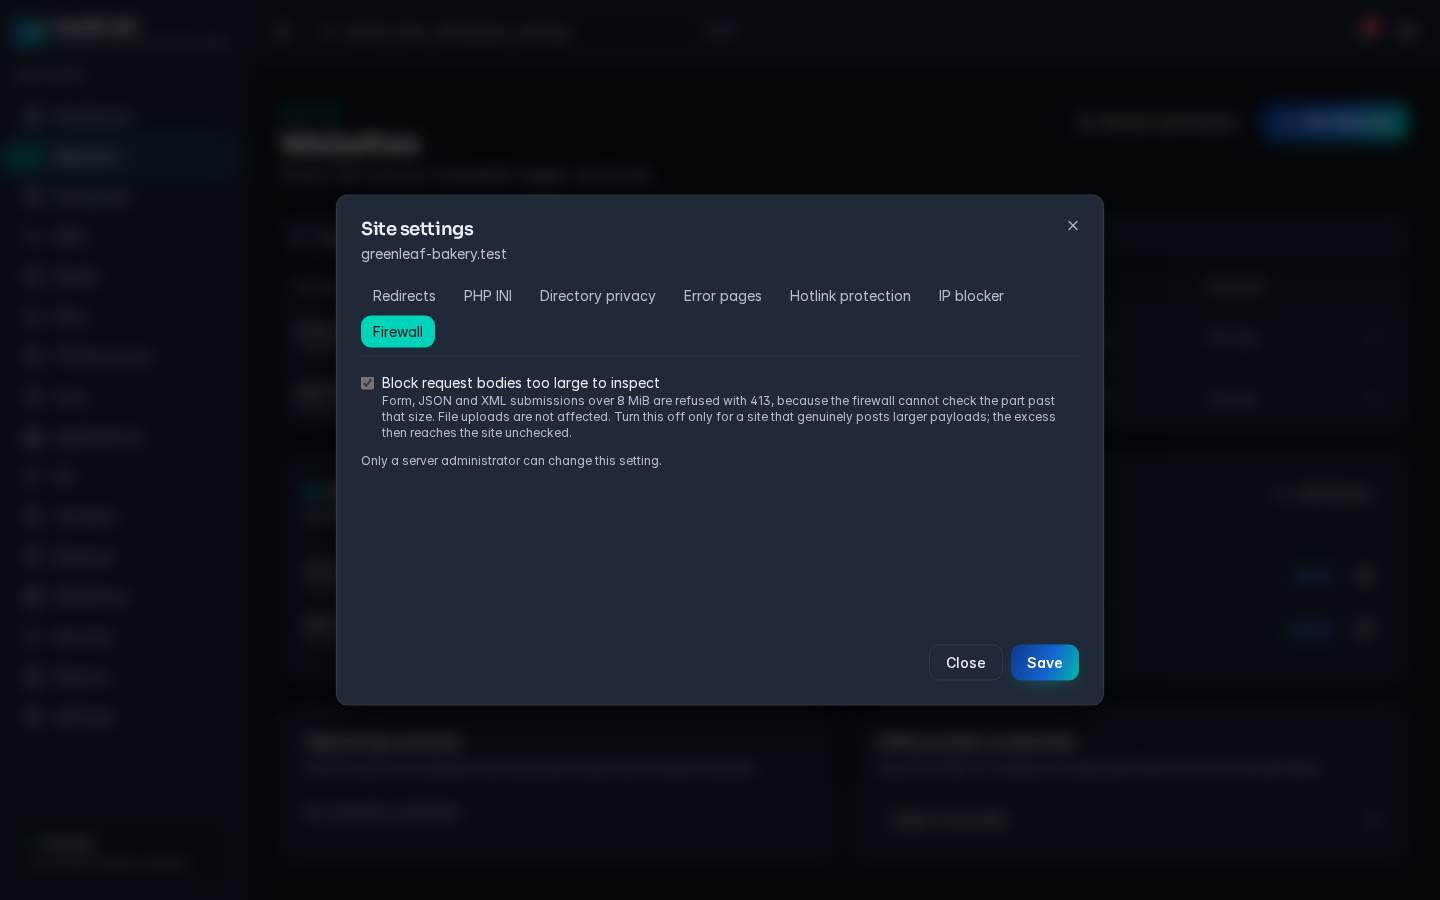
Section titled “Firewall”Block request bodies too large to inspect is on by default. Form, JSON and XML submissions over 8 MiB are refused with a 413 error, because the web application firewall cannot check anything past that size. File uploads are not affected. Turning it off lets larger submissions reach the site unchecked.
Only a server administrator can change this setting. Other users see it greyed out with the note "Only a server administrator can change this setting."
Rewrite rules (.htaccess)
Section titled “Rewrite rules (.htaccess)”nginx does not read .htaccess files. HostCraft translates them into nginx rules for you, so WordPress permalinks, force HTTPS rules, RewriteRule lines, deny rules and password protected folders keep working after a move from cPanel.
Open the row's actions menu and choose Rewrite rules (.htaccess).
From .htaccess
Section titled “From .htaccess”- The summary shows how many
.htaccessfiles and translated rules the site has, and when they were last translated. - Translate .htaccess runs the translation now. On success you see "Rules applied and nginx reloaded."
- Not translated lists every directive that could not be converted, with the file, line and reason. These directives have no effect under nginx. If every directive worked, the dialog says "Every directive was translated."
- Generated nginx configuration shows the rules that were produced.
- Re-translate automatically when a .htaccess file changes: HostCraft checks for changes every few minutes, so edits made by a CMS or plugin are picked up. When this is off, changes are flagged for you to review and the current rules stay live.
When a .htaccess file changes you may see one of these notices:
| Notice | Meaning | What to do |
|---|---|---|
| .htaccess changed, review translation | A file was edited and the old rules are still live. | Translate now to apply the change, or Keep current rules. |
| .htaccess changed and was translated again | The new rules are live, but some directives could not be translated. | Read the list, then Dismiss. |
| .htaccess changed, but the new translation was rejected | The previous rules are still live. | Fix the .htaccess file (or the custom rules) and choose Translate now. |
Reverse proxy sites forward every request to their upstream, so .htaccess files do not apply to them.
Custom nginx rules
Section titled “Custom nginx rules”Raw nginx directives for the site, in two boxes:
- Rewrite rules run before every location, after the firewall. For example
rewrite ^/shop/(.*)$ /store/$1 permanent; - Server block holds locations, headers and access rules.
Click Save rules. The rules are tested before they go live; a rule set nginx rejects is not applied. Whether you can edit this tab is decided by the server administrator. If you cannot, it says "Custom nginx rules are managed by your server administrator."
Page cache
Section titled “Page cache”Open the row's actions menu and choose Page cache. The cache stores rendered pages so repeat visits do not run PHP again.
- The top of the dialog shows live statistics: Entries, Size, Hit ratio and Hits / misses.
- Cache enabled turns the cache on or off.
- TTL (seconds): how long a page is kept.
- Max size (MB): the most disk space the cache may use.
- Bypass cache for logged-in users: logged in visitors (for example WordPress editors) always get a fresh page.
- Click Save to apply.
To clear the cache:
- Enter a full address such as
https://example.com/pageand click Purge URL to clear one page. If single page purge is not supported on this server, the whole cache is purged and the dialog tells you so. - Click Purge everything and confirm to clear the whole cache for the site. The dialog shows how many entries were removed and how much space was freed.
Open the row's actions menu and choose Logs.
- Raw Access shows the web server access log; Errors shows the error log.
- Lines chooses how many recent lines to show: 100, 500 or 2000.
- Follow keeps the view updating while you watch.
- Refresh reloads it now, and Download saves the whole current log file.
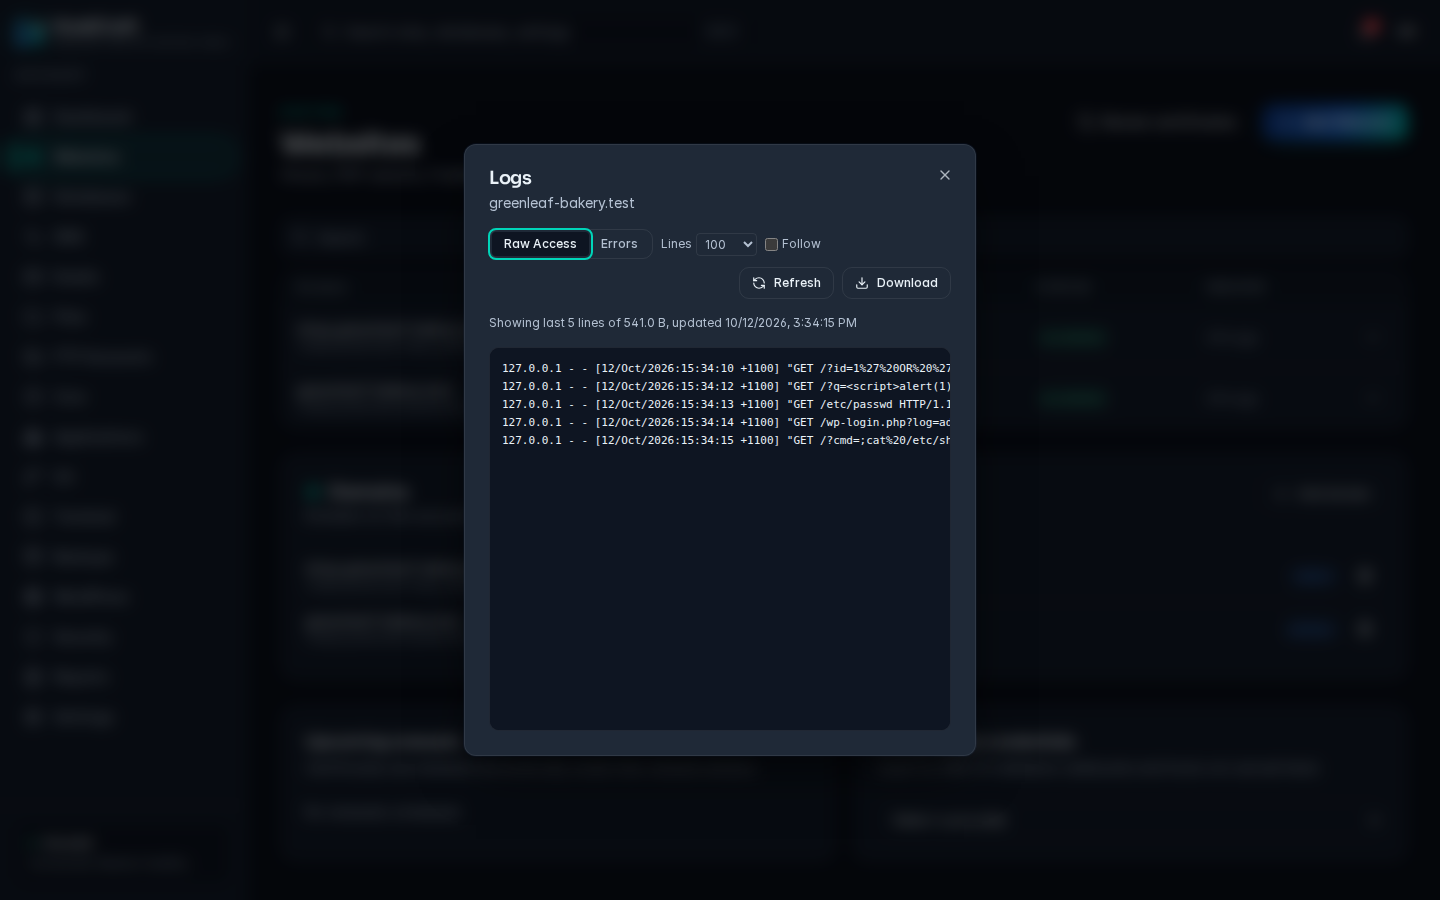
If the log is larger than the lines shown, the dialog says that older lines are omitted; download the file to see everything.
SSL certificates
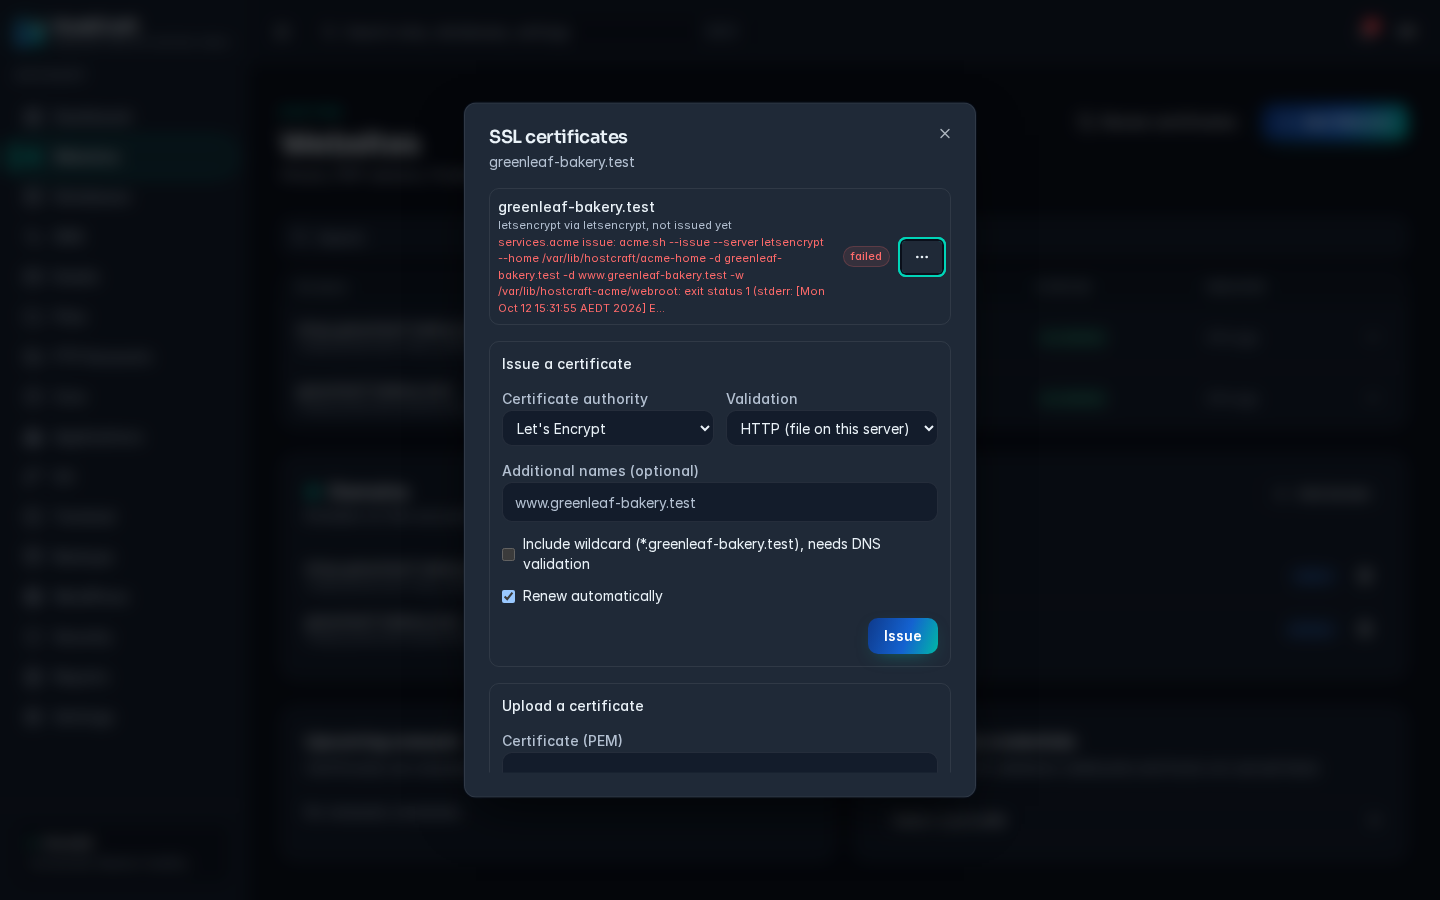
Section titled “SSL certificates”Open the row's actions menu and choose SSL certificates. The dialog lists every certificate for the site's domain with its type, issuer, expiry and status (issued, failed or revoked). If issuing failed, the error from the certificate authority is shown under the certificate.
Issue a certificate
Section titled “Issue a certificate”- Under Issue a certificate, choose the Certificate authority: Let's Encrypt, ZeroSSL or Buypass.
- Choose Validation:
- HTTP (file on this server): works when the domain already points at this server.
- DNS (TXT record via provider): works for wildcards and for names not served here. Pick the DNS provider. You must save that provider's credentials first (see below).
- Optionally enter Additional names, for example
www.example.com. Separate several names with spaces or commas. - Tick Include wildcard to add
*.yourdomain. This needs DNS validation. - Leave Renew automatically ticked unless you have a reason not to.
- Click Issue.
Install, renew, revoke or delete
Section titled “Install, renew, revoke or delete”Use the actions menu on a certificate:
- Install on this site: puts an issued certificate on this website.
- Renew now: renews straight away. Uploaded certificates cannot be renewed here; upload the new one instead.
- Delete: removes the certificate after you confirm.
- Revoke and delete: asks the certificate authority to revoke it, then deletes it. Shown only for issued certificates from a certificate authority.
Upload your own certificate
Section titled “Upload your own certificate”If you bought a certificate elsewhere, paste it under Upload a certificate:
- Certificate (PEM): the certificate, starting with
-----BEGIN CERTIFICATE-----. - Private key (PEM): the matching private key.
- Chain (PEM, optional): the intermediate certificates from your provider.
- Click Upload. The certificate is installed on this site.
Uploaded certificates are not renewed automatically. Upload the replacement before the old one expires.
Renew all certificates
Section titled “Renew all certificates”Renew certificates at the top of the page queues renewal for every certificate on the account. Hover over the button to see how many will be renewed. You rarely need it: certificates are renewed automatically inside their renewal window.
Upcoming renewals and DNS provider credentials
Section titled “Upcoming renewals and DNS provider credentials”Below the websites table:
- Upcoming renewals lists when each certificate will next be renewed.
- DNS provider credentials stores the API credentials used for DNS validation. Pick a provider, fill in the fields it asks for and click Save. To remove stored credentials, use the remove button and confirm. If the panel says "No DNS providers are supported on this server", DNS validation is not available and you can only use HTTP validation.
Other row actions
Section titled “Other row actions”- Visit site opens the site in a new tab.
- Disable site takes the site offline without deleting anything. Enable site brings it back.
- Reload nginx reloads the web server configuration for the site. Use it if a change does not seem to have applied.
- Remove site deletes the website after you confirm. Files are kept on disk. Databases, mailboxes and DNS records are not touched; remove them separately if you no longer need them.
Licence and plan limits
Section titled “Licence and plan limits”- Your hosting plan can limit how many websites an account may have.
- The server's licence also limits the total number of websites on the server (the free tier allows 10). When the limit is reached, Create website shows an error explaining the limit, with a hint for the administrator. Existing sites are never affected.
- If the server's licence has expired, creating new websites is paused until it is renewed. Existing sites keep serving, and you can still change their settings.
Common problems
Section titled “Common problems”| Message or symptom | Cause and fix |
|---|---|
| No domains on this account. Add one first. | Add the domain in the Domains panel, then try again. |
| site already exists for this domain | A domain can only have one website. Edit the existing site instead. |
| PHP x.y is not installed on this server | Pick another version, or ask the server administrator to install it. |
| FrankenPHP is not available on this server | Use PHP-FPM, or ask the administrator to install FrankenPHP. |
| site already uses this runtime | You chose the handler and version the site already has. |
| proxy_target scheme must be http or https | Enter the upstream as http://127.0.0.1:PORT or similar. |
| proxy_target may not point at the HostCraft panel API | The upstream cannot be the panel itself. Use your application's port. |
| A value in PHP INI is refused | The message names the allowed range. Use a value inside it, or leave the field blank. |
| Certificate status is failed | Read the error under the certificate. With HTTP validation the domain must point at this server and must not be blocked by an IP allow list. Use DNS validation for wildcards. |
| Pages still show old content | Purge the page cache, or turn on Bypass cache for logged-in users while editing. |
A rewrite from .htaccess does nothing |
Open Rewrite rules (.htaccess) and check the Not translated list. Directives listed there do not work under nginx. |
| Large form submissions fail with 413 | The firewall refuses bodies over 8 MiB that it cannot inspect. Ask a server administrator to review the Firewall tab for the site. |