
Databases
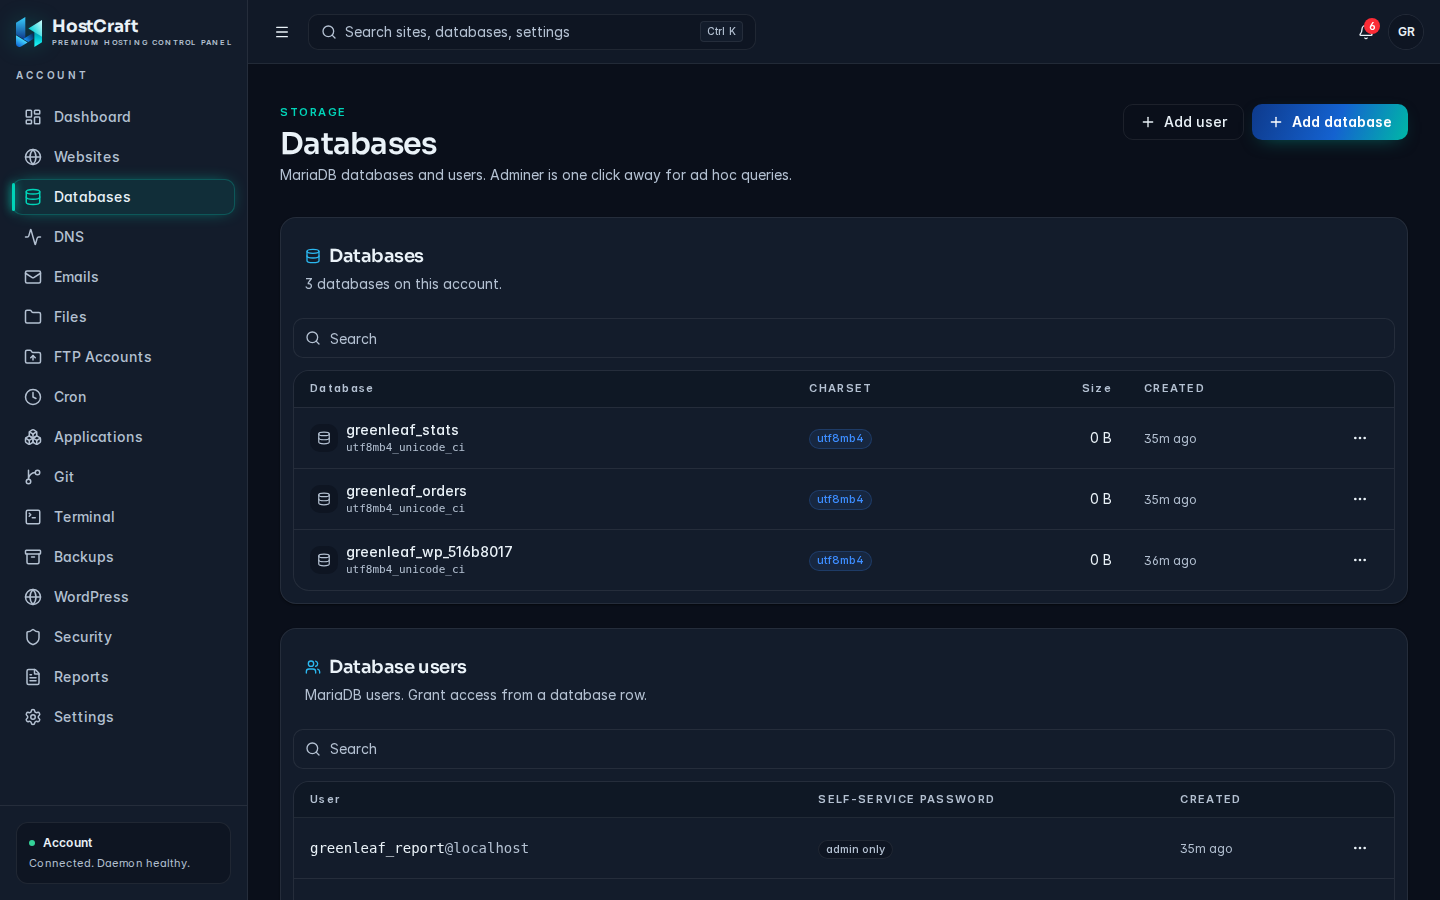
The Databases page (sidebar, under Storage) is where you create the MariaDB databases your websites and applications use, create the database users that connect to them, and decide which user can reach which database. Adminer, a web based database tool, is one click away for running queries or importing data.
The page has two cards:
- Databases: every database on your account, with its charset, collation, size and creation time.
- Database users: every database user, the host it may connect from, whether it can change its own password, and when it was created.
Who can use this page
Section titled “Who can use this page”| Role | What they can do |
|---|---|
| Account owner | Everything on this page for their own account. |
| Sub-user | Only what the account owner granted. A sub-user with the read only support preset sees the lists and Live stats but no create, edit or delete actions. |
| Reseller | Read only access to databases and database users for accounts in their pool (through the API). The reseller panel has no Databases page. |
| Server admin | Full access across every account. |
| Mailbox user | No access. |
Your hosting plan can cap the number of databases. When the cap is reached, creating another database fails with a plan limit error (see Common errors).
Names and the account prefix
Section titled “Names and the account prefix”Database names and database user names always start with your account username followed by an underscore, the same convention cPanel uses. The dialogs show this prefix in front of the name box and add it for you, so you type only the part after it.
For example, if your account username is acme and you type shop, the database is created as acme_shop. Use the full prefixed name in your application's configuration.
Create a database
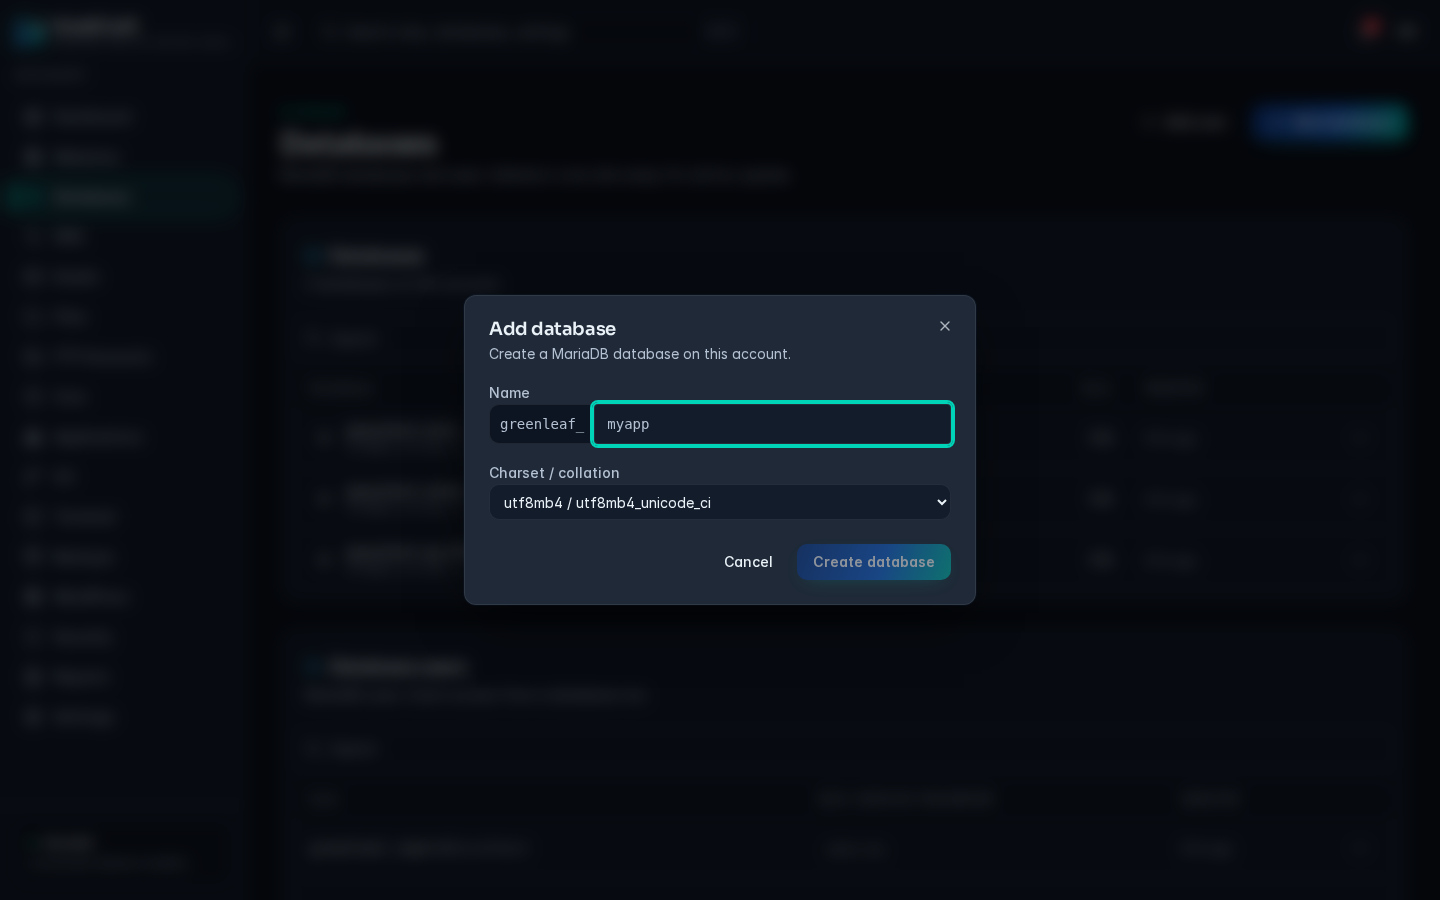
Section titled “Create a database”- Click Add database at the top right.
- In Name, type the part after the prefix, for example
myapp. - In Charset / collation, pick one of:
utf8mb4 / utf8mb4_unicode_ci(default, right for almost every modern application, including WordPress)utf8mb4 / utf8mb4_general_cilatin1 / latin1_swedish_ci(only for old applications that need it)
- Click Create database.
The new database appears in the Databases card. It is empty, and no user can reach it until you grant access.
Create a database user
Section titled “Create a database user”- Click Add user at the top right.
- In Username, type the part after the prefix.
- Leave Host as
localhostunless you know you need something else.localhostis what websites and applications on the same server use. - A strong random password is already filled in Password. Click the generate button next to it for a new one, or type your own.
- Copy the password now. It is not shown again after the user is created.
- Leave Allow this user to change its own password ticked unless you want password changes locked (see Self-service password).
- Click Create user.
The Create user button stays disabled until the prefix has loaded and both username and password are filled in.
Grant a user access to a database
Section titled “Grant a user access to a database”Access is managed from the database, not the user.
- In the Databases card, open the actions menu (three dots) on the database row.
- Choose Manage access.
- Current access lists every user that already has access and their privileges.
- In Grant access to, select the user.
- Leave All privileges ticked for a normal website or application. To limit the user, untick it and choose from SELECT, INSERT, UPDATE, DELETE, CREATE, DROP, ALTER and INDEX. At least one privilege is required.
- Click Grant access.
To remove access, click the revoke button next to the user under Current access. The user itself is not deleted.
A user can only be granted access to databases on the same account.
Connect your application
Section titled “Connect your application”Use these values in your application's configuration file (for WordPress, wp-config.php):
| Setting | Value |
|---|---|
| Host | localhost |
| Database name | the full prefixed name, for example acme_shop |
| Username | the full prefixed user name |
| Password | the password you copied when creating the user |
Open Adminer
Section titled “Open Adminer”Adminer lets you browse tables, run SQL, and import or export data in the browser without typing database credentials.
- In the Database users card, open the actions menu on the user you want to act as.
- Choose Open Adminer.
Adminer opens in a new tab, signed in as that user, and can see only the databases that user has been granted. If nothing opens, check that your browser did not block the pop-up. If the panel shows "Could not open Adminer.", try again, then contact your host.
View live stats
Section titled “View live stats”Open the actions menu on a database and choose Live stats (read only users click the chart button instead). The dialog shows the database's current Size, number of Tables, and Last query time, read straight from the database engine. Click Refresh to update the numbers.
Change a user's password
Section titled “Change a user's password”- In the Database users card, open the actions menu on the user.
- Choose Change password.
- Type the new password and confirm.
Update the password in your application's configuration straight away, or the site loses its database connection.
This only works when the user's Self-service password column shows allowed. If it shows admin only, the change is refused with "user is locked from password changes". Turn self-service back on first (below).
Self-service password
Section titled “Self-service password”The Self-service password column shows whether a password change is allowed for the user (allowed) or locked (admin only). To switch it, open the user's actions menu and choose Allow self-service password or Disallow self-service password. Locking is useful for a user whose password is managed elsewhere and must not drift.
Change host
Section titled “Change host”The user menu has a Change host item, but changing the host of an existing user is not supported in this version. The panel refuses it with "host changes are not supported in v1; recreate the user". To use a different host, create a new user with the host you need, grant it access, and delete the old user.
Delete a user
Section titled “Delete a user”Open the user's actions menu, choose Delete user, and confirm. Any application still using that user can no longer connect.
Drop a database
Section titled “Drop a database”Open the database's actions menu, choose Drop database, and confirm the prompt "Drop database ... ? This deletes all its data."
Dropping a database permanently deletes all of its tables and data. Take a backup first (see Backups) if there is any chance you need the data again.
Common errors
Section titled “Common errors”| Message | Cause and fix |
|---|---|
| database ... already exists | A database with that name is already on the server. Pick another name. |
| user ...@... already exists | That user and host combination exists. Pick another username. |
| name ... must start with ... | The name was sent without your account prefix. Use the dialog, which adds it for you. |
| account ... already at plan limit | Your plan's database limit is reached. Drop an unused database or ask your host for a bigger plan. |
| at least one privilege required | You unticked All privileges without choosing any. Tick at least one. |
| refusing to grant cross account access | The user and the database belong to different accounts. |
| user is locked from password changes | Self-service password is off for this user. Allow it, then change the password. |
| host changes are not supported in v1 | Create a new user with the new host instead. |
| Could not open Adminer. | The Adminer session could not be started. Allow pop-ups and retry. |