
Reseller guide
A reseller owns a pool of hosting accounts on a HostCraft server and manages it from the reseller panel. Your server administrator creates your reseller, sets your pool ceiling and gives you a login. Everything you see is limited to your own pool: you never see another reseller's accounts or events.
Sign in
Section titled “Sign in”Sign in at your provider's HostCraft login page with the email and password your administrator gave you. You land on the reseller Overview. If your administrator requires two-factor sign-in for resellers, you are asked to add a passkey or authenticator app within the grace period (see Settings).
The reseller sidebar has Overview, Accounts, Plans, Domains, Backups, Audit Log and Settings.
If you see that your reseller is suspended, or you cannot sign in, contact your server administrator: suspending a reseller signs out every reseller login and blocks new sign-ins.
Overview
Section titled “Overview”The page is titled with your reseller name, for example "Acme Hosting pool".
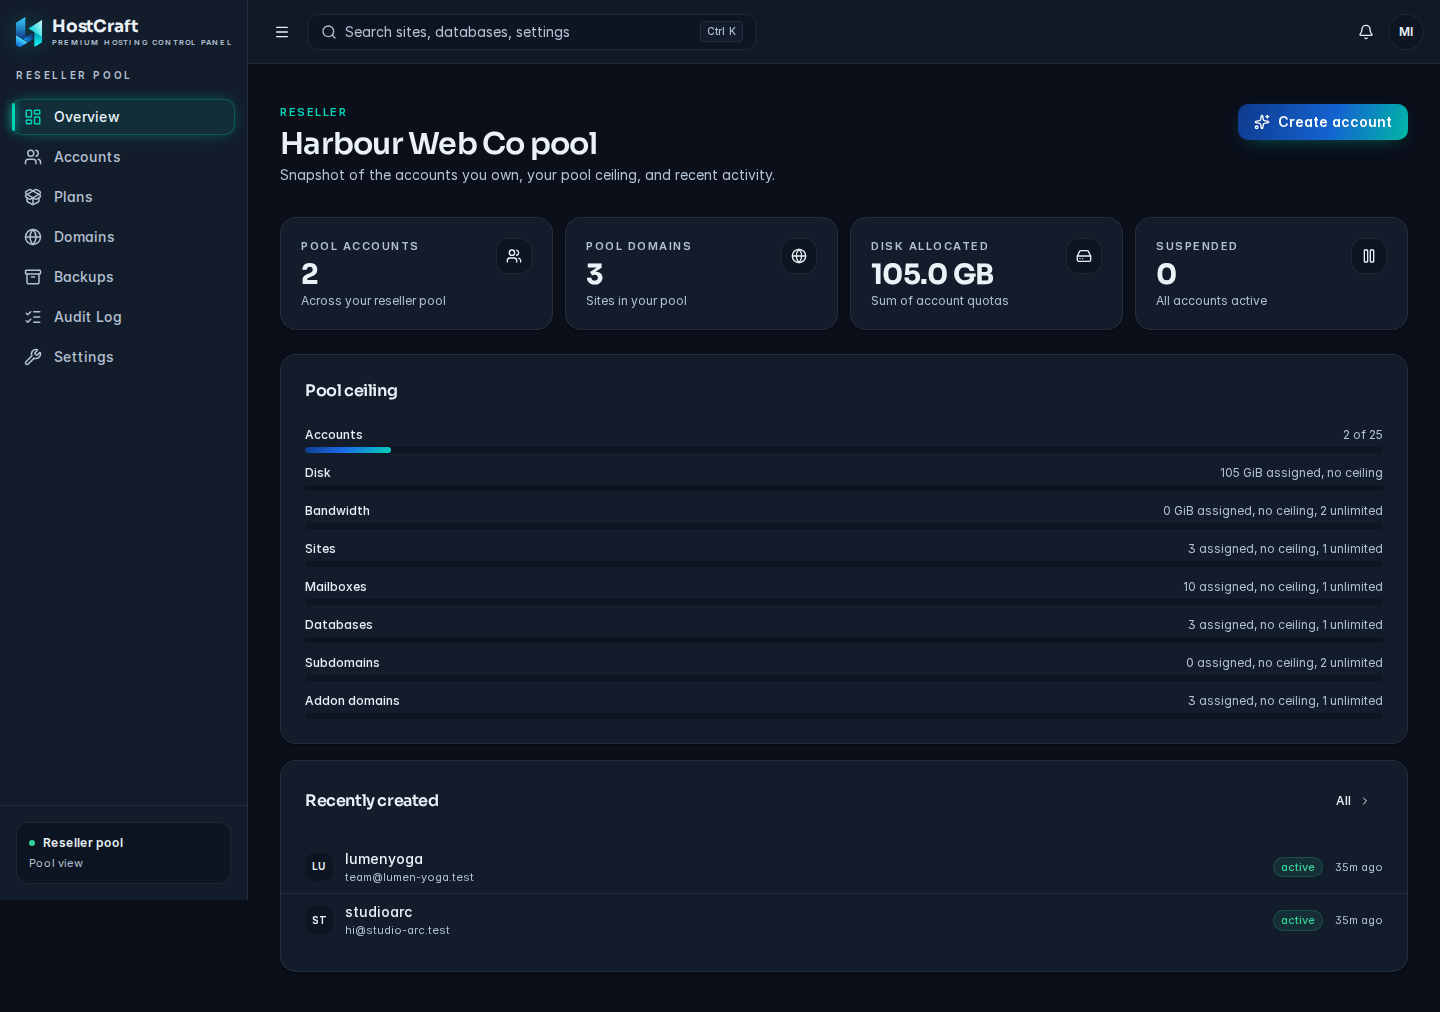
- Pool accounts: how many accounts are in your pool.
- Pool domains: domains across those accounts.
- Disk allocated: the total disk quota of your accounts, with your disk ceiling underneath when one is set.
- Suspended: accounts currently suspended.
- Pool ceiling: each ceiling your administrator set (accounts, disk, bandwidth, sites, mailboxes, databases, subdomains, addon domains) with how much of it your accounts use.
- Recently created: your newest accounts, with an All link to the full list.
About the pool ceiling
Section titled “About the pool ceiling”The ceiling is the total your administrator has agreed for your pool. Usage is the sum of the limits assigned to your accounts, not what customers actually use. The ceiling is advisory: HostCraft reports usage against it but does not stop you creating an account when you reach it. Talk to your administrator before you go over it.
Accounts
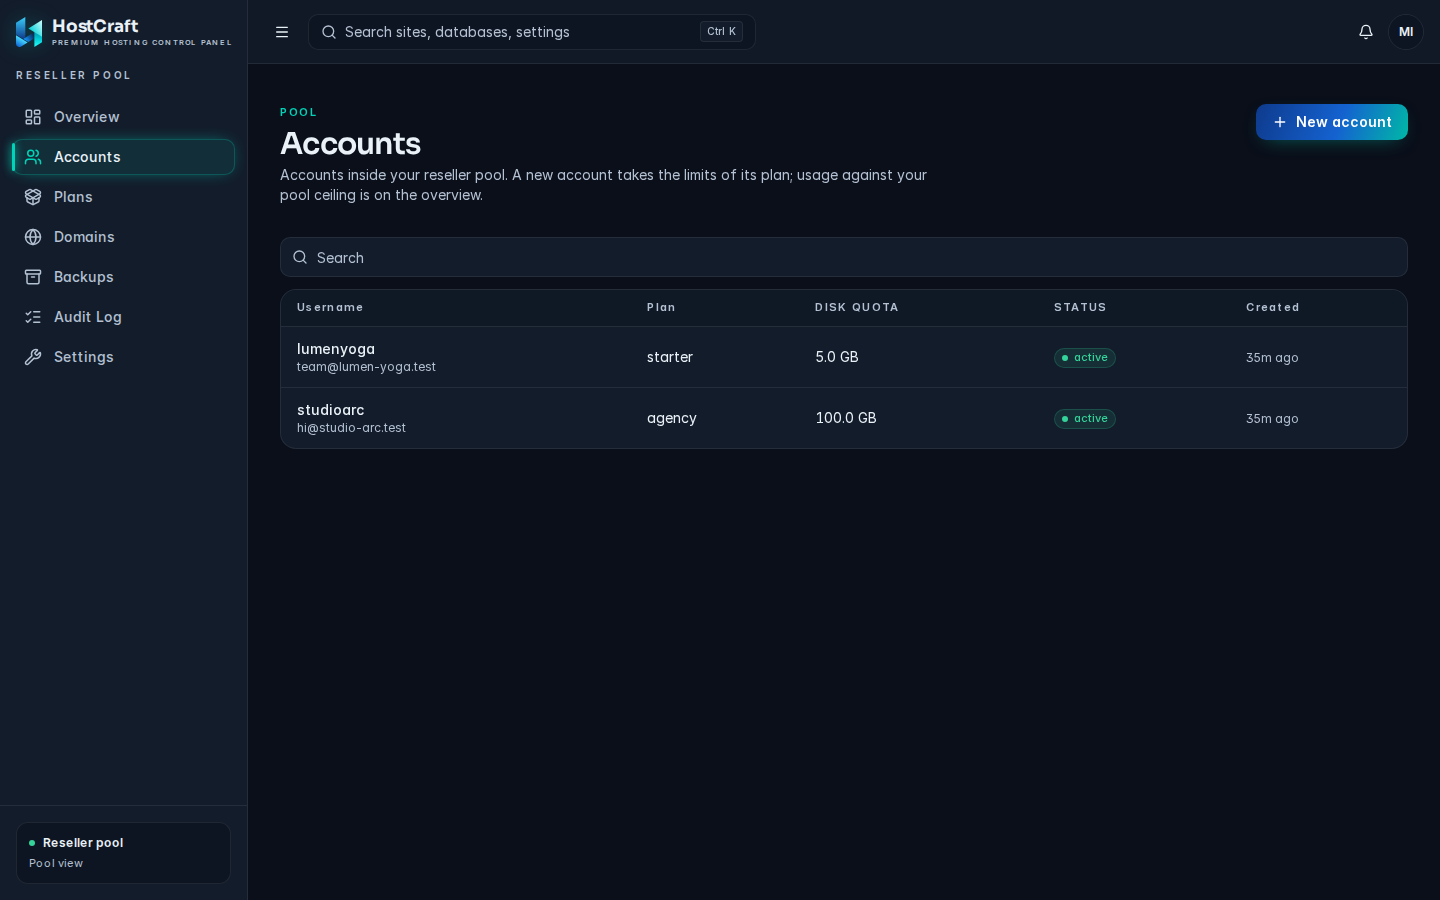
Section titled “Accounts”Open Accounts. The page lists the accounts in your pool with Username (and email), Plan (Custom when the account has no plan), Disk quota, Status and Created. Search by username or email.
Create an account
Section titled “Create an account”- Click New account. The Create a customer account dialog opens.
- Primary domain (optional): used to suggest a username. Add the domain itself after the account exists.
- Username: 1 to 16 lowercase letters or digits, starting with a letter. It becomes the customer's Linux user, home directory and database prefix, and cannot be changed later. A green tick means it is available.
- Email: the customer's contact address.
- Display name (optional).
- Initial password: at least 12 characters. The customer can change it after signing in.
- Allow PHP 5.6 (Snuffleupagus hardened legacy mode): only if the customer needs it.
- Click Create account.
The account is always created in your pool. The dialog shows Provisioning account while HostCraft creates the login, Linux user, home directory, quota and SFTP access, and closes when it is done. If a step fails, everything is rolled back.
Send the customer their username, the login page address and the initial password. They then follow the Getting started guide.
Common errors
Section titled “Common errors”| Message | Fix |
|---|---|
| "Use 1 to 16 lowercase letters or digits, starting with a letter." | Change the username to match the rule. |
| A red cross with a reason under Username | The name is taken or reserved. Choose another. |
| "This server's HostCraft license blocked the request. Existing sites keep serving. Contact your hosting provider." | The server's license does not allow more accounts right now. Contact your server administrator. |
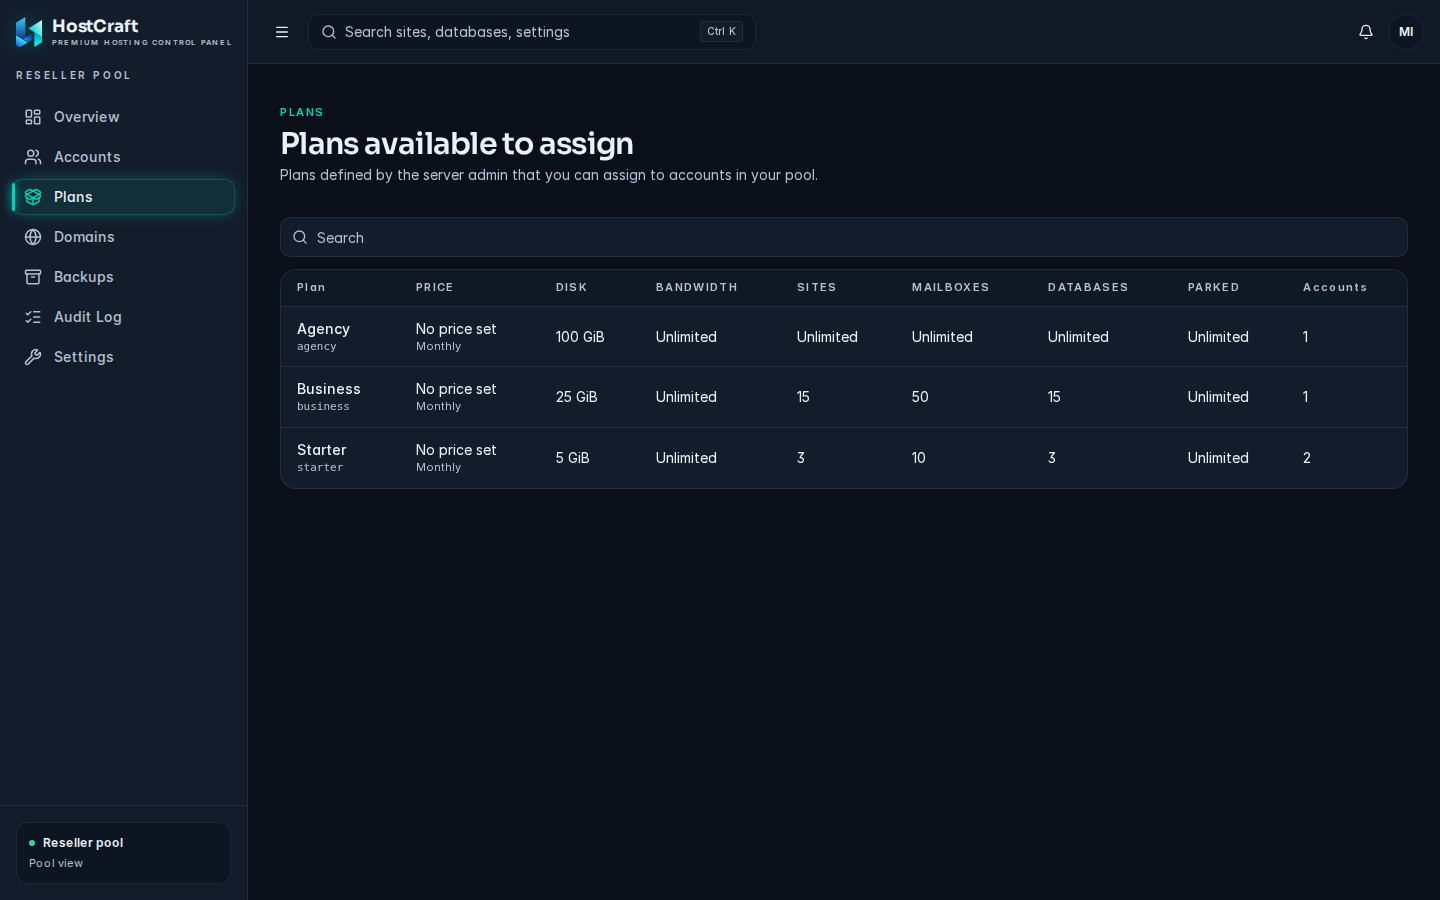
Open Plans. The page is titled Plans available to assign and lists the plans your server administrator defined, with Price, Disk, Bandwidth, Sites, Mailboxes, Databases, Parked and Accounts. This list is read-only. If you need a different plan, ask your administrator to create it.
Domains
Section titled “Domains”Open Domains. It lists every domain in your pool with Domain, Account (the account that manages it), Type (primary, addon or parked), DNS (authoritative when this server hosts the zone, external otherwise), SSL and Created. Search by domain or account.
Domains are added by the account owner from Websites in their own panel.
Backups
Section titled “Backups”Open Backups. The page is titled Pool snapshots and lists backup snapshots across your accounts: Snapshot ID, Account, Repository, Taken, Files and Size. Snapshots appear after a backup job runs successfully for one of your accounts.
Backup repositories and jobs are set up by the account owner (see Backups) or by your server administrator. Restores are done from the account's own panel.
Audit log
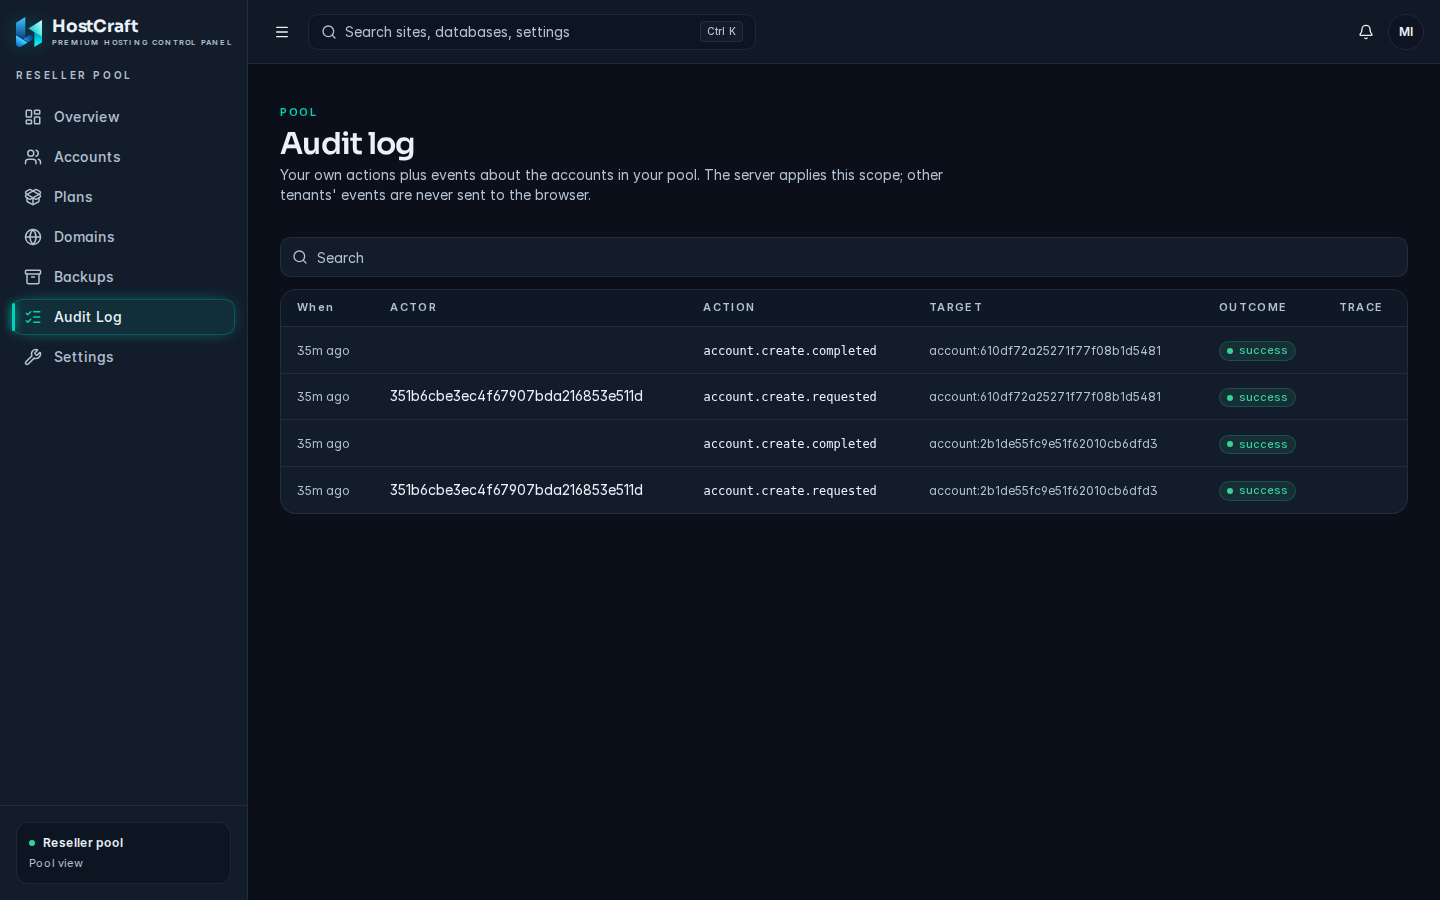
Section titled “Audit log”Open Audit Log. It shows your own actions plus events about the accounts in your pool, with When, Actor, Action, Target, Outcome (success, failure or denied) and Trace. Search by actor, action or target.
Every entry carries a trace ID. Give it to your administrator or support when you report a problem.
Settings
Section titled “Settings”Open Settings. It has three tabs.
Profile
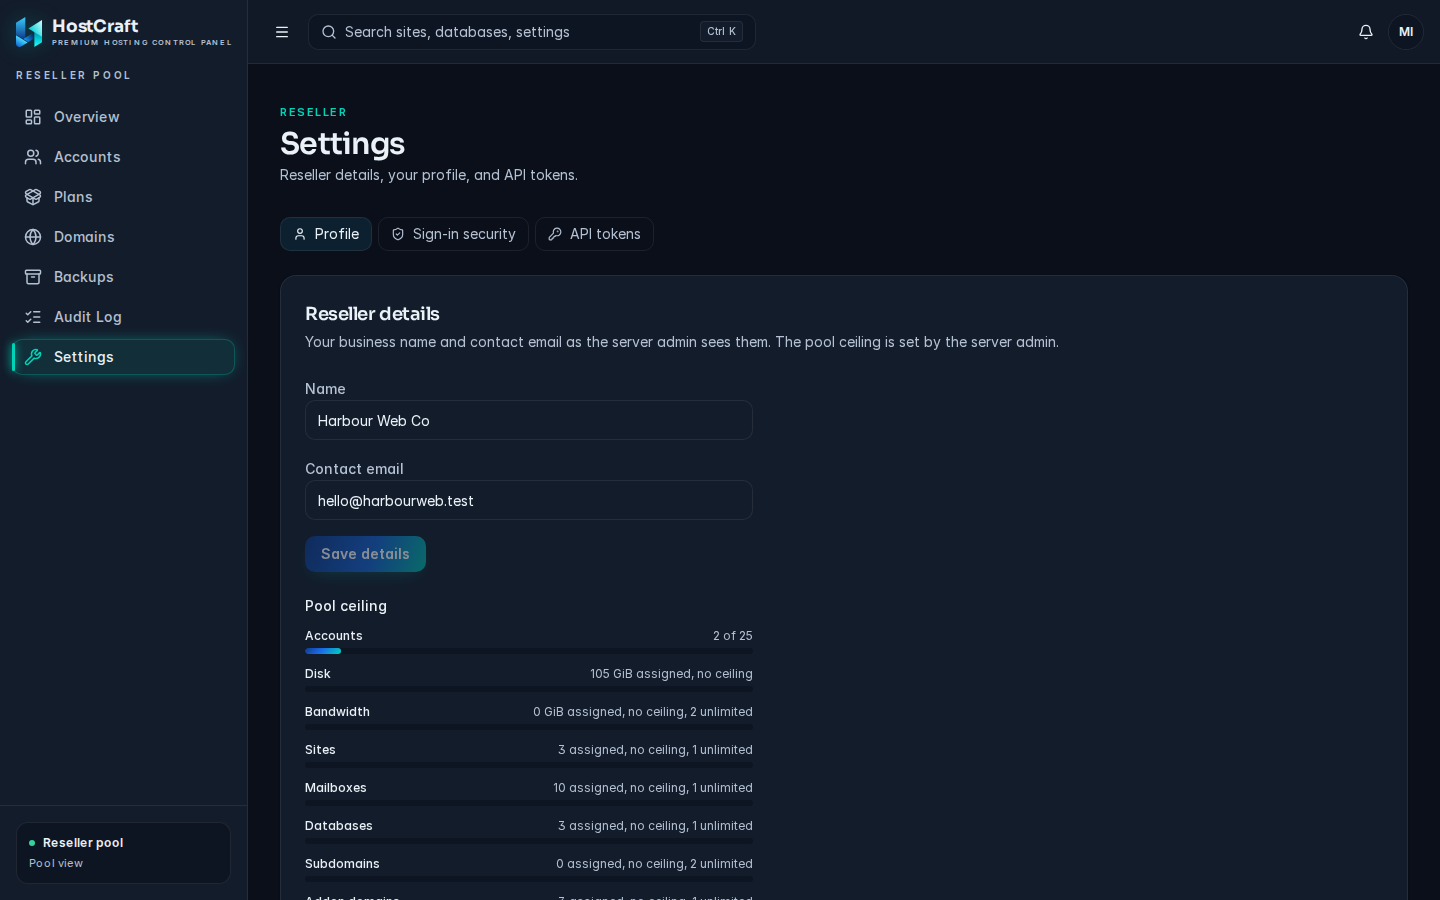
Section titled “Profile”- Reseller details: your business Name and Contact email as the server administrator sees them. Change them and click Save details. The card also shows your pool ceiling, which only the administrator can change.
- Reseller profile: your personal Display name, shown in the panel and the audit log. Click Save profile. Your Email is your login identity; ask the server administrator to change it.
Sign-in security
Section titled “Sign-in security”Change your password, add or remove passkeys and authenticator apps, manage recovery codes and sign out other sessions. See Settings for step by step instructions.
API tokens
Section titled “API tokens”Create tokens for scripts and integrations that work with your pool. Tokens act with your reseller permissions.
- Enter a New token name.
- Choose when it Expires.
- Tick at least one scope. Pick only what the integration needs.
- Click Create token and copy the token. It is shown once.
Click Revoke to stop a token working.
Staff logins
Section titled “Staff logins”Your administrator can create several logins for your reseller, for example one per staff member. Each login signs in to the same reseller panel and acts on the same pool. Ask your administrator to add or remove logins.